Setup your workspace
First steps to get your workspace ready, and start uploading builds
Basic setup, and custom subdomain
On sign up you'll be prompted to give your workspace a name, and upload a logo. This will be used in various places through the app, including on views your users may see - such as share links and distribution groups.
While it's optional, it's also advised to choose a workspace subdomain now. This will let you share download links with your custom subdomain.

Create your first application
You'll want to begin by creating your first Application. In Buildstash, all builds and releases are grouped under an application.
Applications can contain builds targeting multiple platforms (up to 12 platforms per application, to provide plenty flexibility).
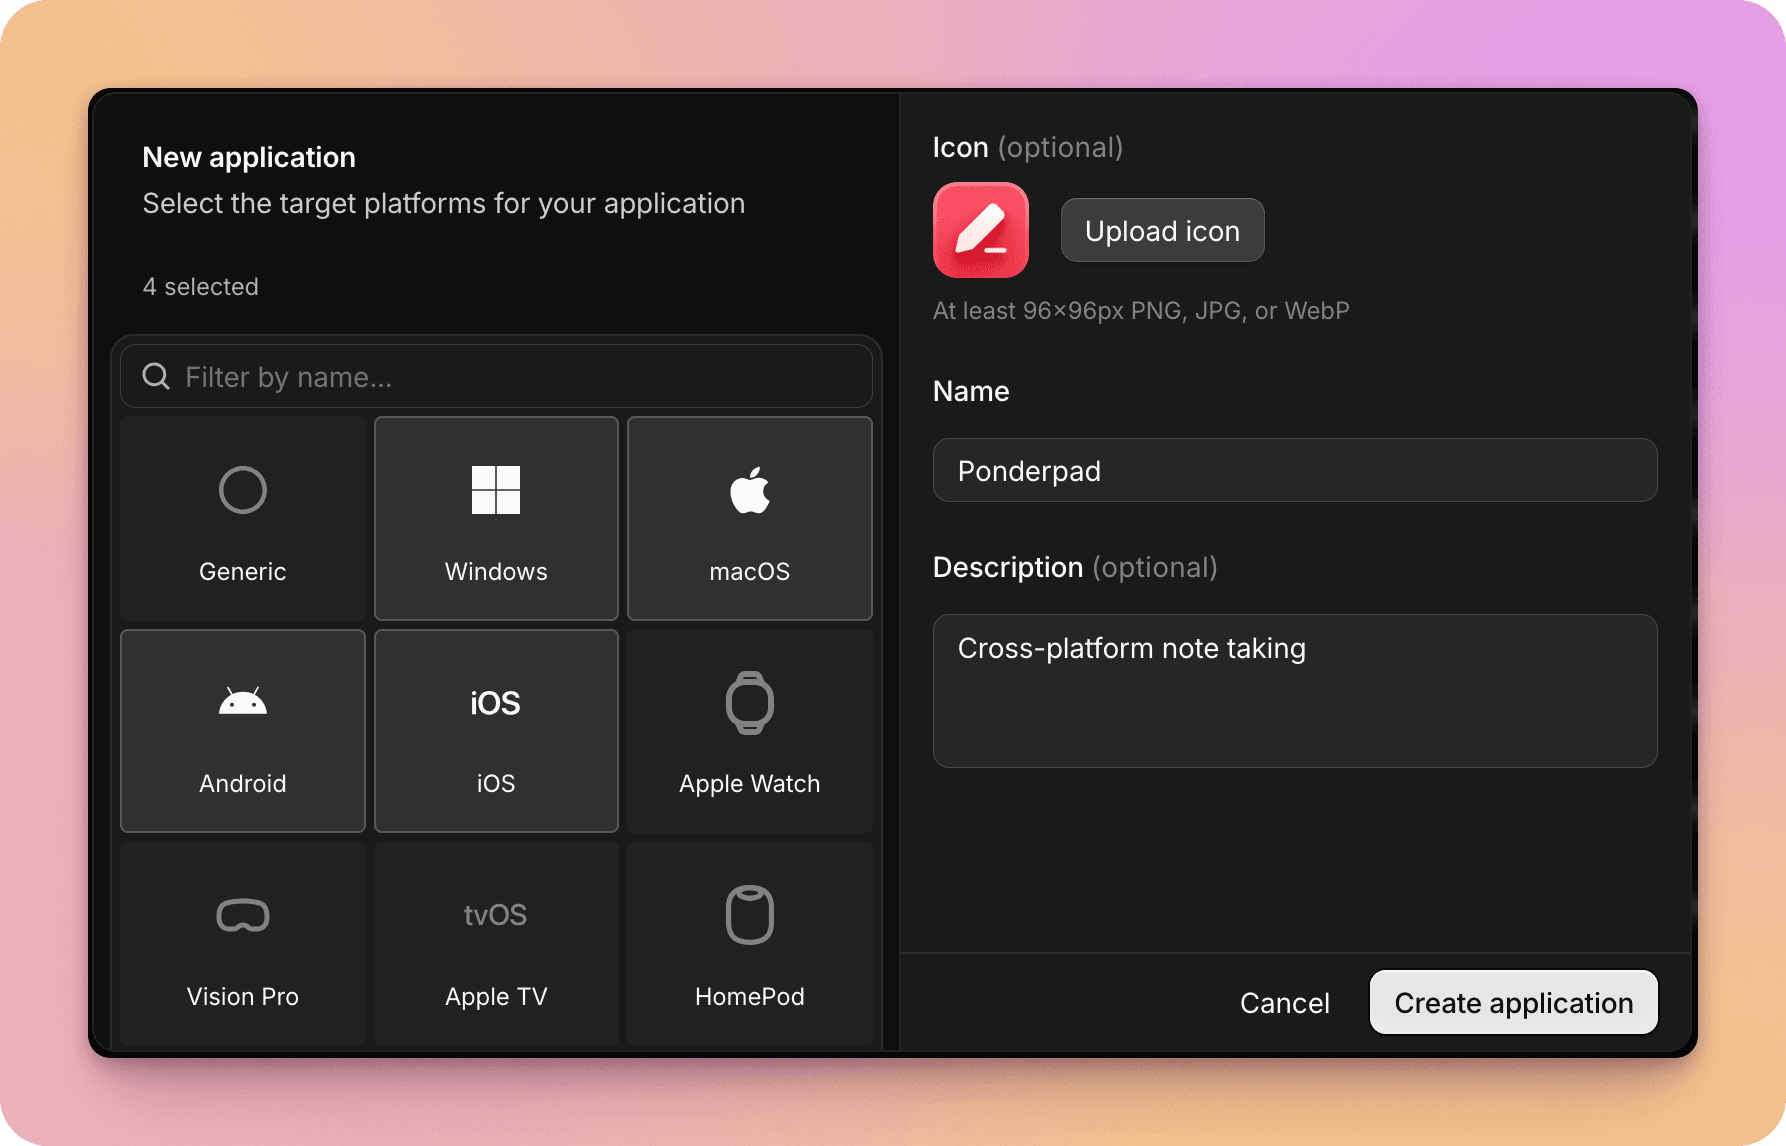
Once you've setup your first application, you can customize settings as preferred - including streams and labels for your workflow.
While Buildstash provides integrated storage as part of your plan, if you prefer to self-hosted your build files, you'll want to setup custom storage now.
Upload your first build
You're then ready to upload your first build!

You can do this via the web uploader, but if you have a CI/CD pipeline - this would be a great time to setup an integration, and automate sending in your builds.
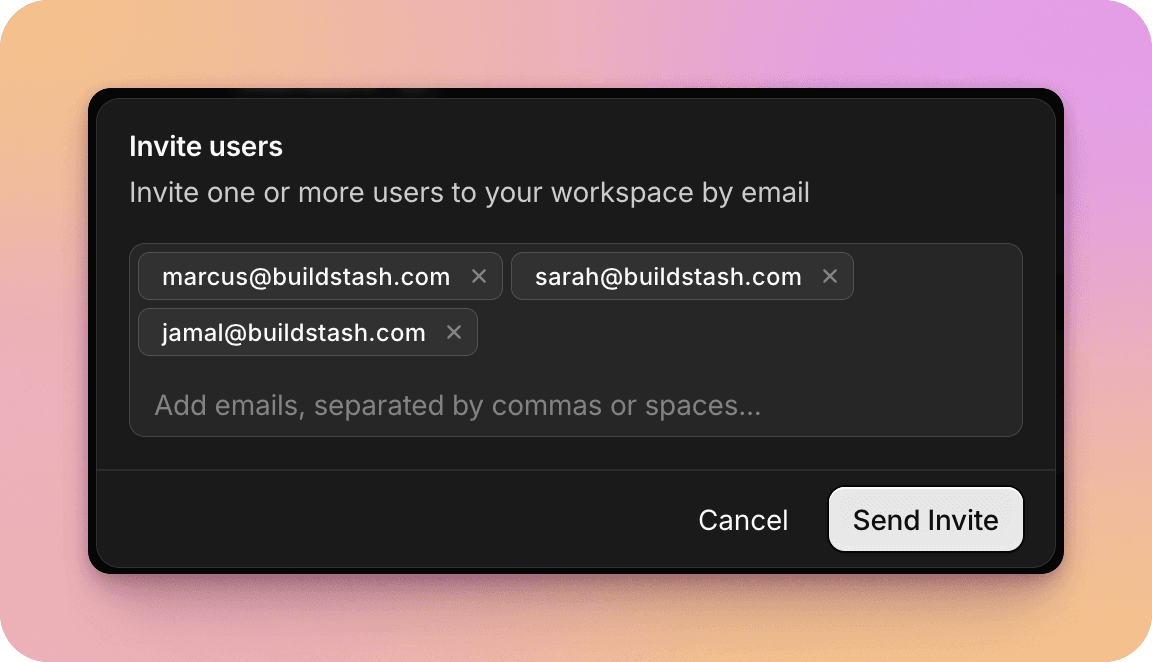
Invite your team
For internal collaborators - anyone you wish to have access to upload and manage builds - you'll want to invite them into your workspace.