Microsoft Entra
Configure Microsoft Entra ID (Azure AD) single sign-on for your organization
This feature is available to users on our Ultra and Enterprise plans.
Introduction
Follow these instructions to allow your users to login to your Buildstash workspace using Microsoft Entra (formerly Azure Active Directory).
Create SSO Application in Entra admin center
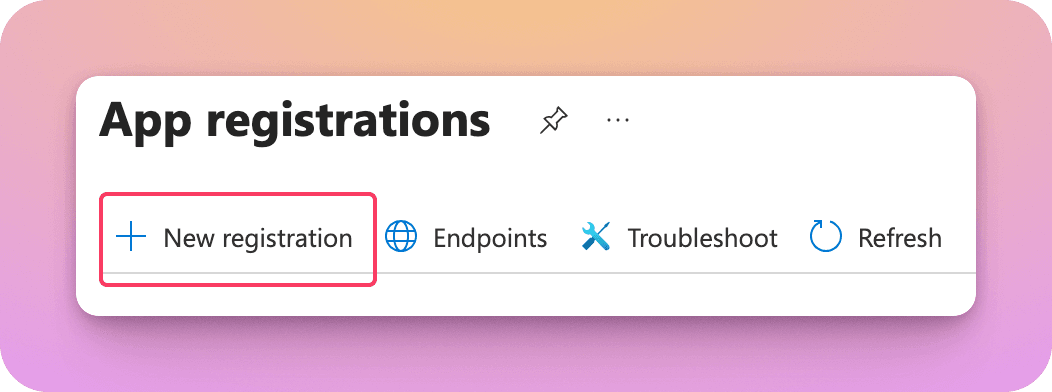
In your Entra admin center, navigate to Entra ID > App registrations, then select "New registration".
Enter "Buildstash" as the application name. To limit access to only users in your organization directory select "Single tenant". And under redirect URI select "Web" and enter your redirect URI. You can copy/paste your redirect URI from the Buildstash interface if helpful (see below).
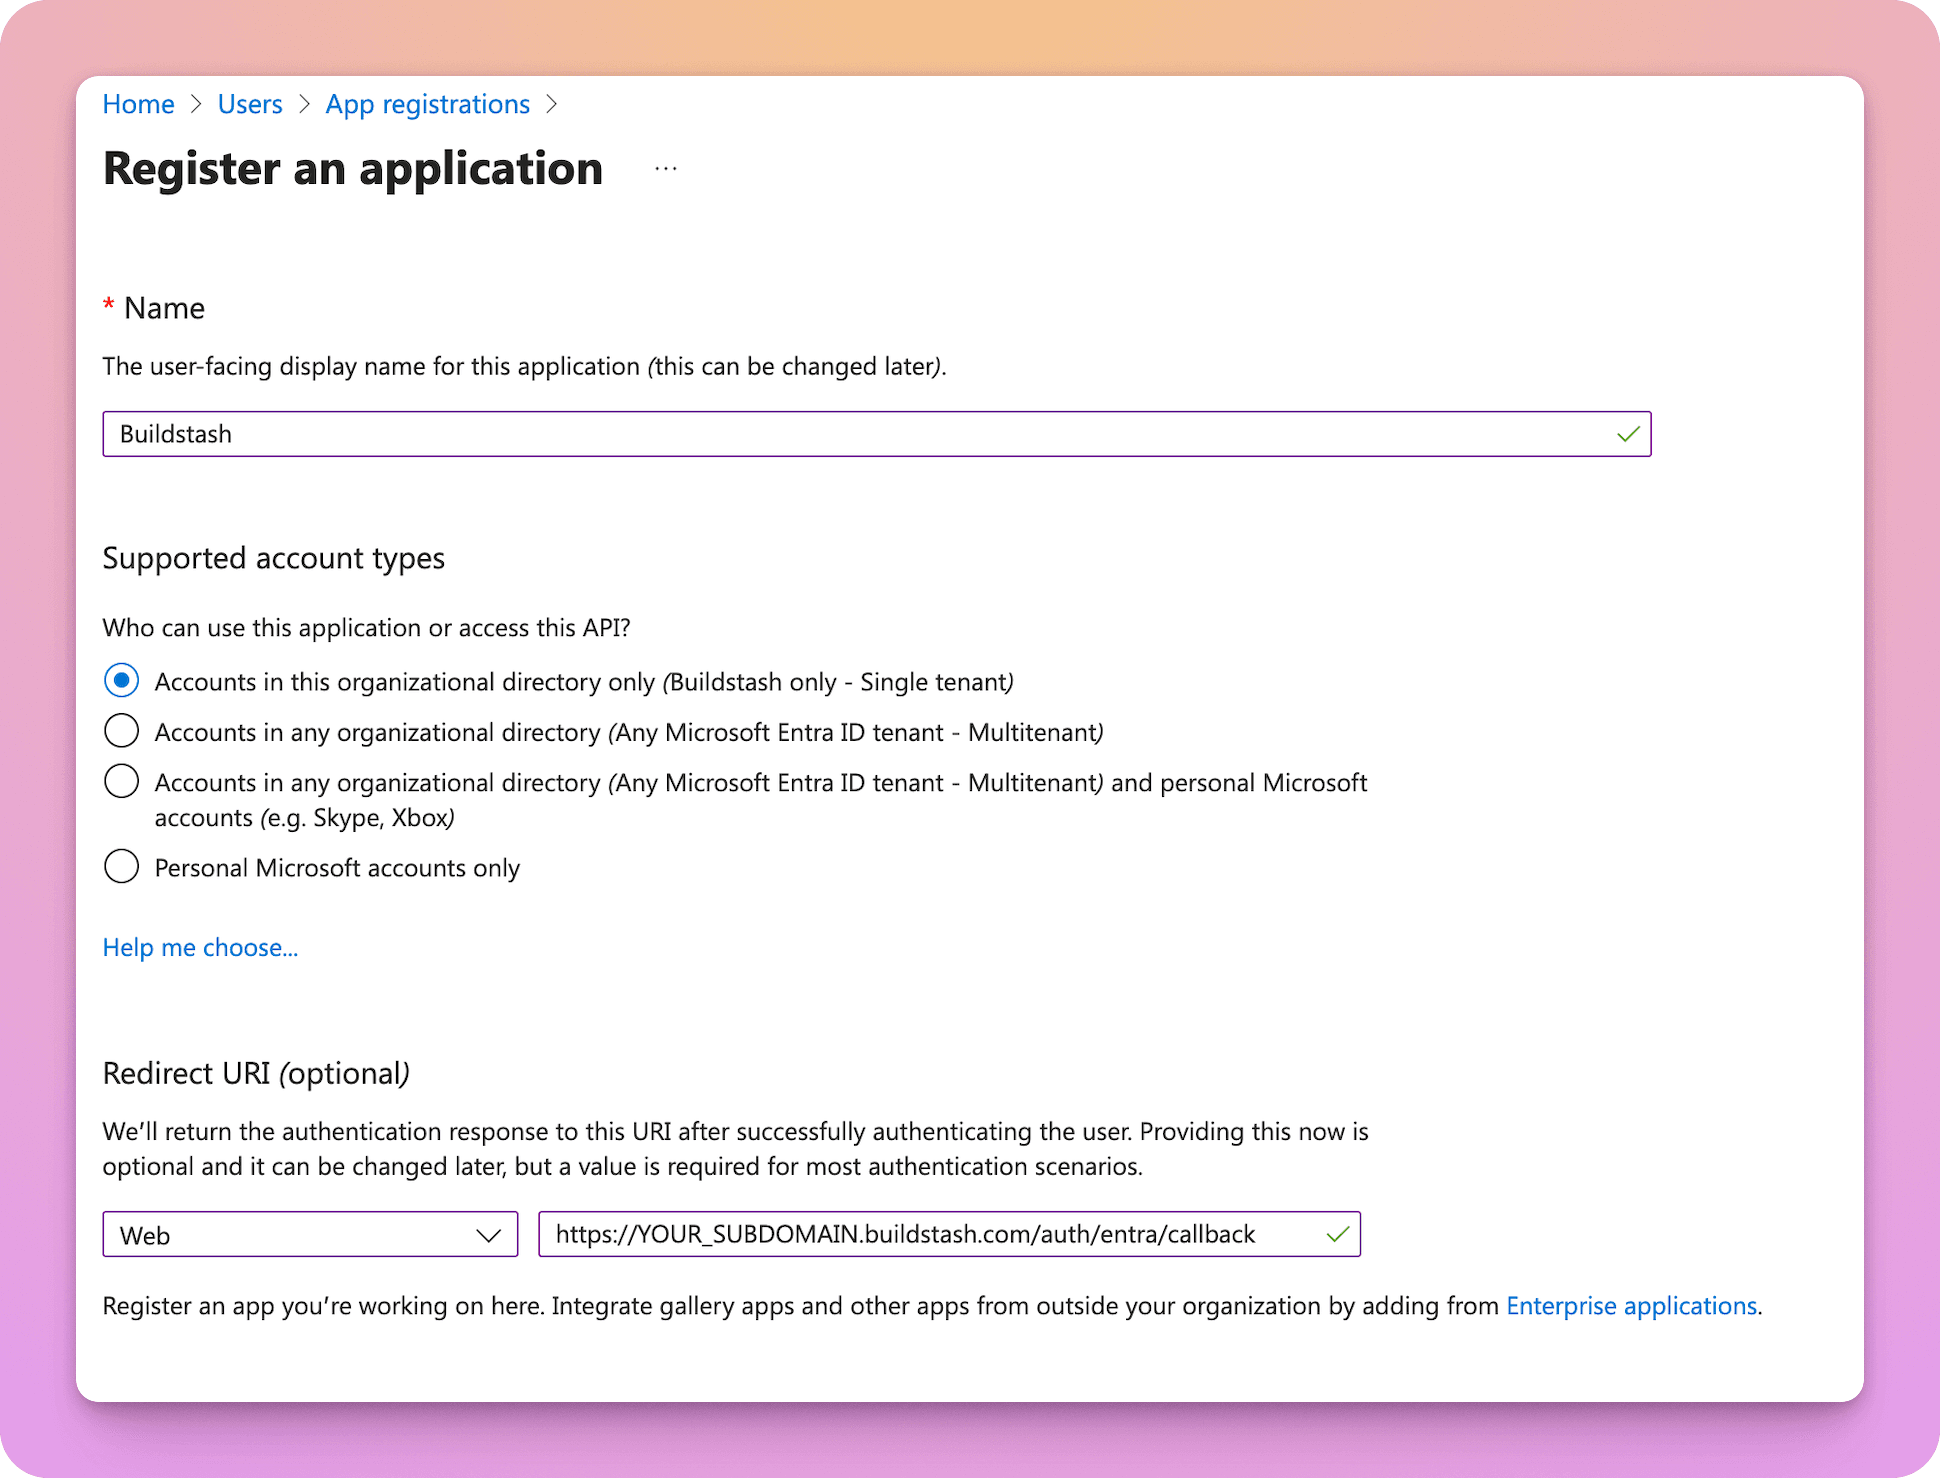
The redirect URI must use your workspace's custom subdomain. The format must be:
https://{SUBDOMAIN}.buildstash.com/auth/entra/callback
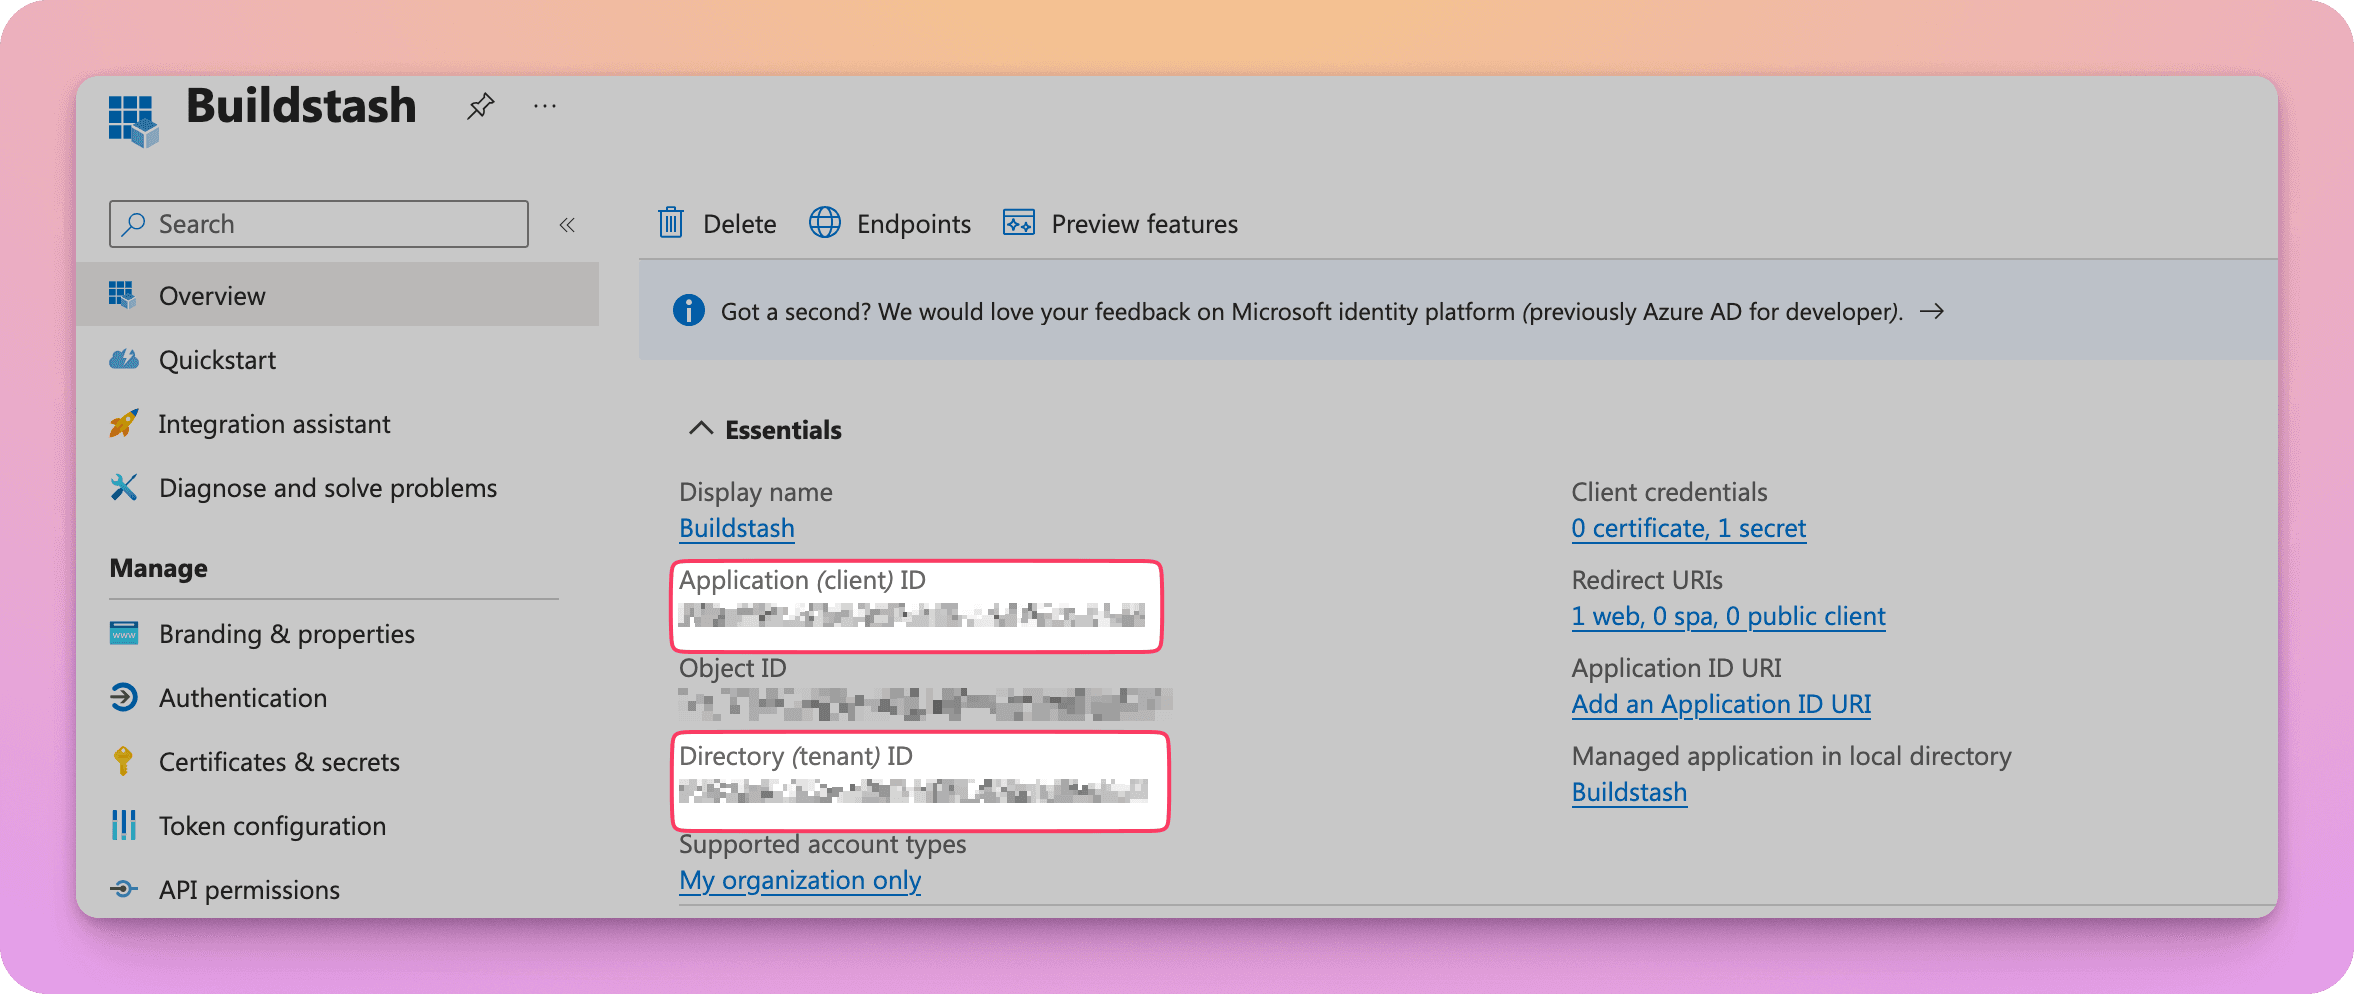
In the "Overview" screen you're taken to for this app, note the "Application (client) ID" to provide as "Client ID" in Buildstash configuration, and also your Tenant ID for the later step.
You'll also need to generate your client secret. Navigate to "Certificates & secrets". Then select "Client secrets", and "New client secret".
Select an expiry date for the secret - we highly recommend you take a note of this date in your calendar. Then the secret is created, you want to copy and take note of the "value" column to use for "Client secret" when setting up in Buildstash.
Remember and assign the app to anyone you wish to have access in Entra.
Configure SSO in Buildstash
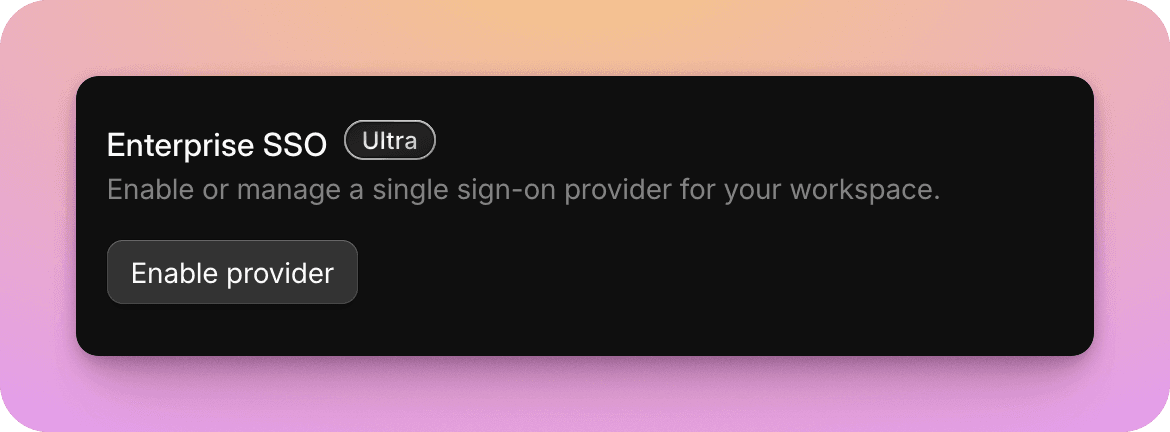
Go to your workspace settings, and under "Enterprise SSO", select "Enable provider".
Input the client ID, secret, and tenant ID for Entra you copied noted from the previous step. Your redirect URI to enter within Entra is also shown here.
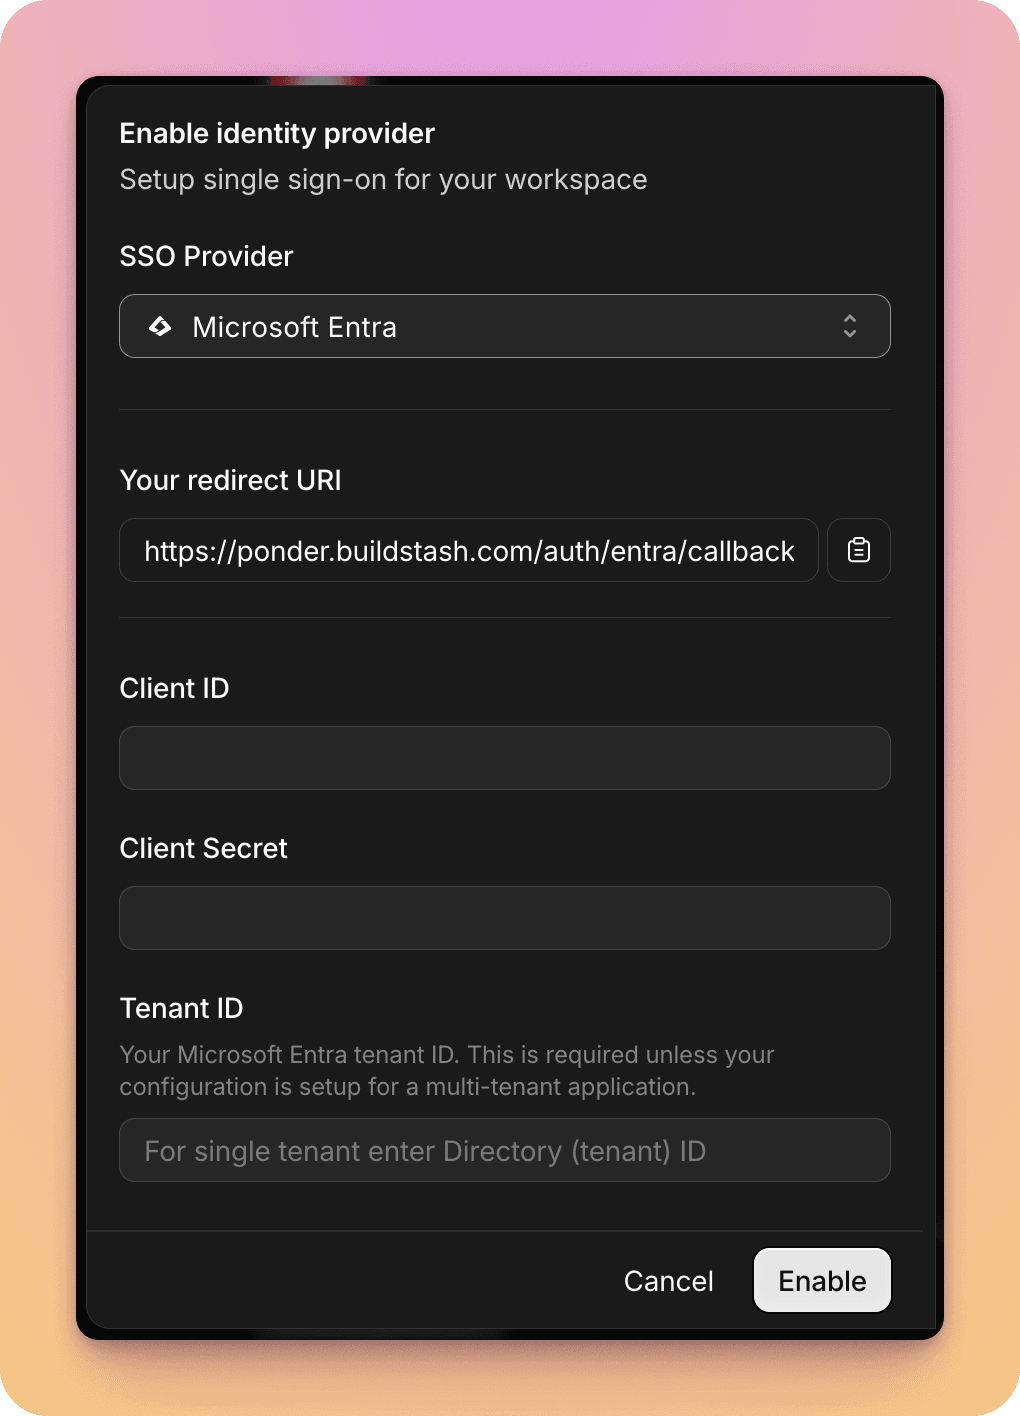
Once details are entered and confirmed you'll see Microsoft Entra connected.

Select "Manage" to update credentials in future, disable non-SSO login, or remove Entra as a login provider in future.
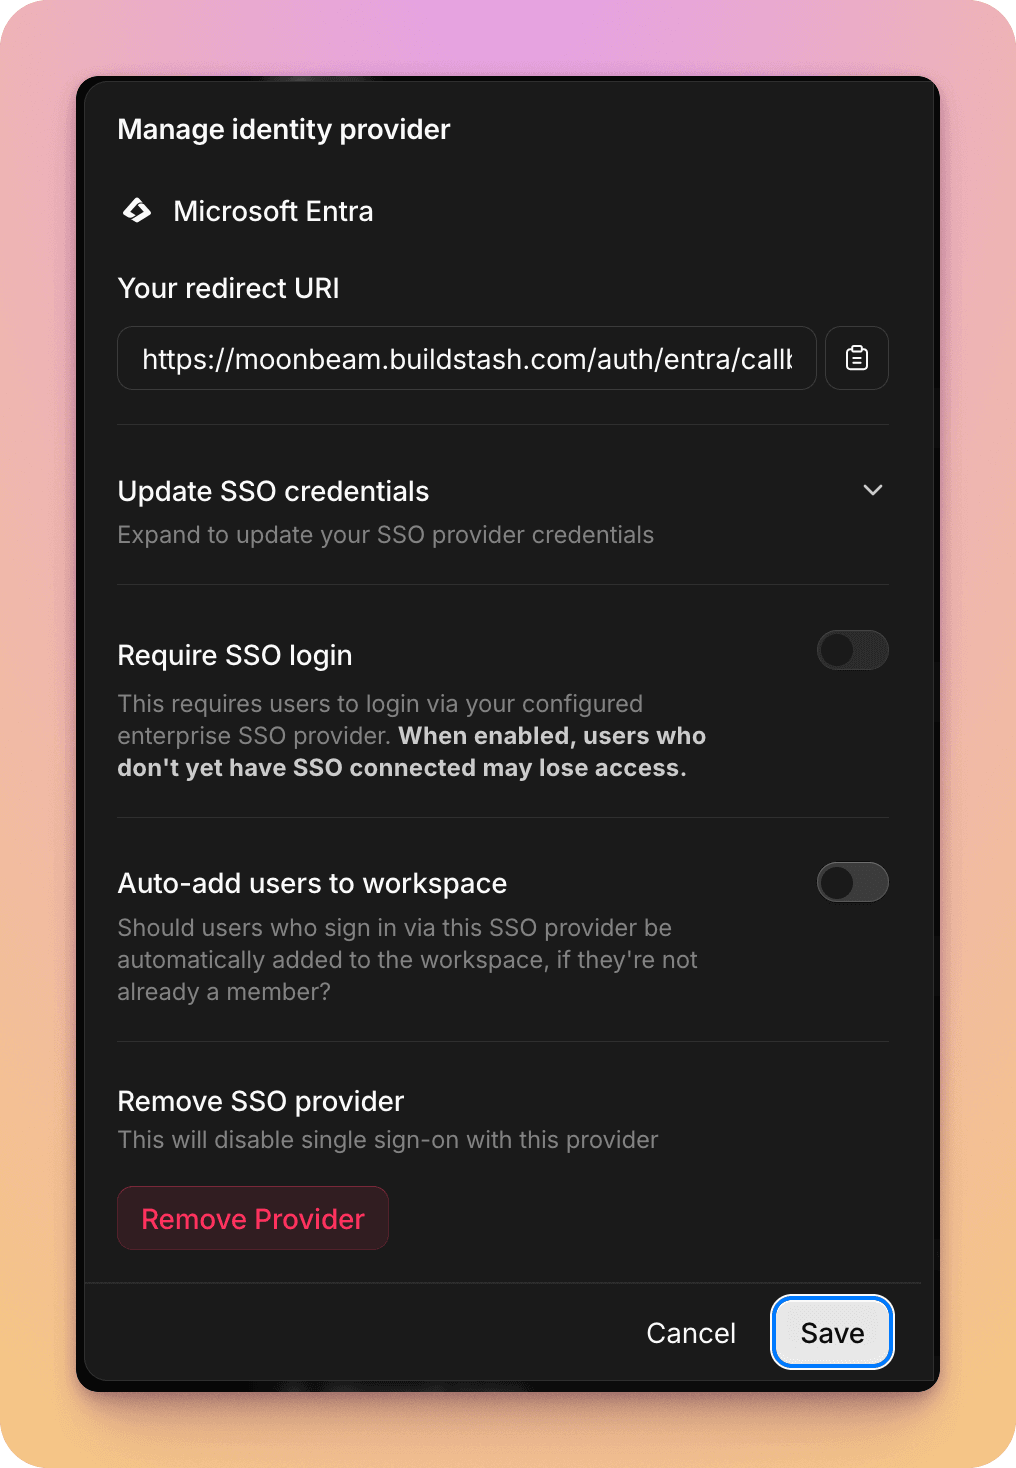
You can optionally require users login via this SSO provider to access your workspace, and there's an option to auto-add users who login via this provider to your workspace if they're not already a member.
You can now navigate to the login page on your workspace custom subdomain, and the Entra SSO option will be presented.