JumpCloud
Configure JumpCloud single sign-on for your organization
This feature is available to users on our Ultra and Enterprise plans.
Introduction
Follow these instructions to allow your users to login to your Buildstash workspace using JumpCloud SSO.
Create SSO Application in JumpCloud
In your JumpCloud admin portal, navigate to "SSO Applications", and select "Add New Application".
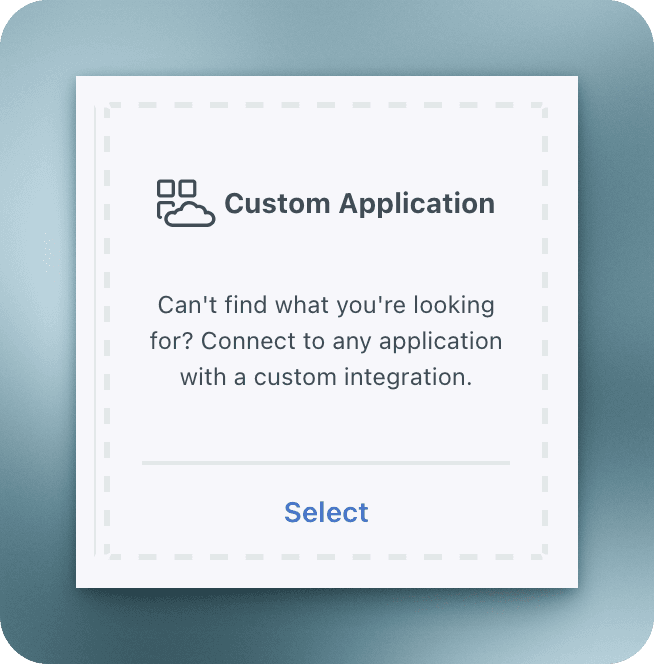
Select "Custom Application".
Then check "Manage Single Sign-On", and select "Configure SSO with OIDC".

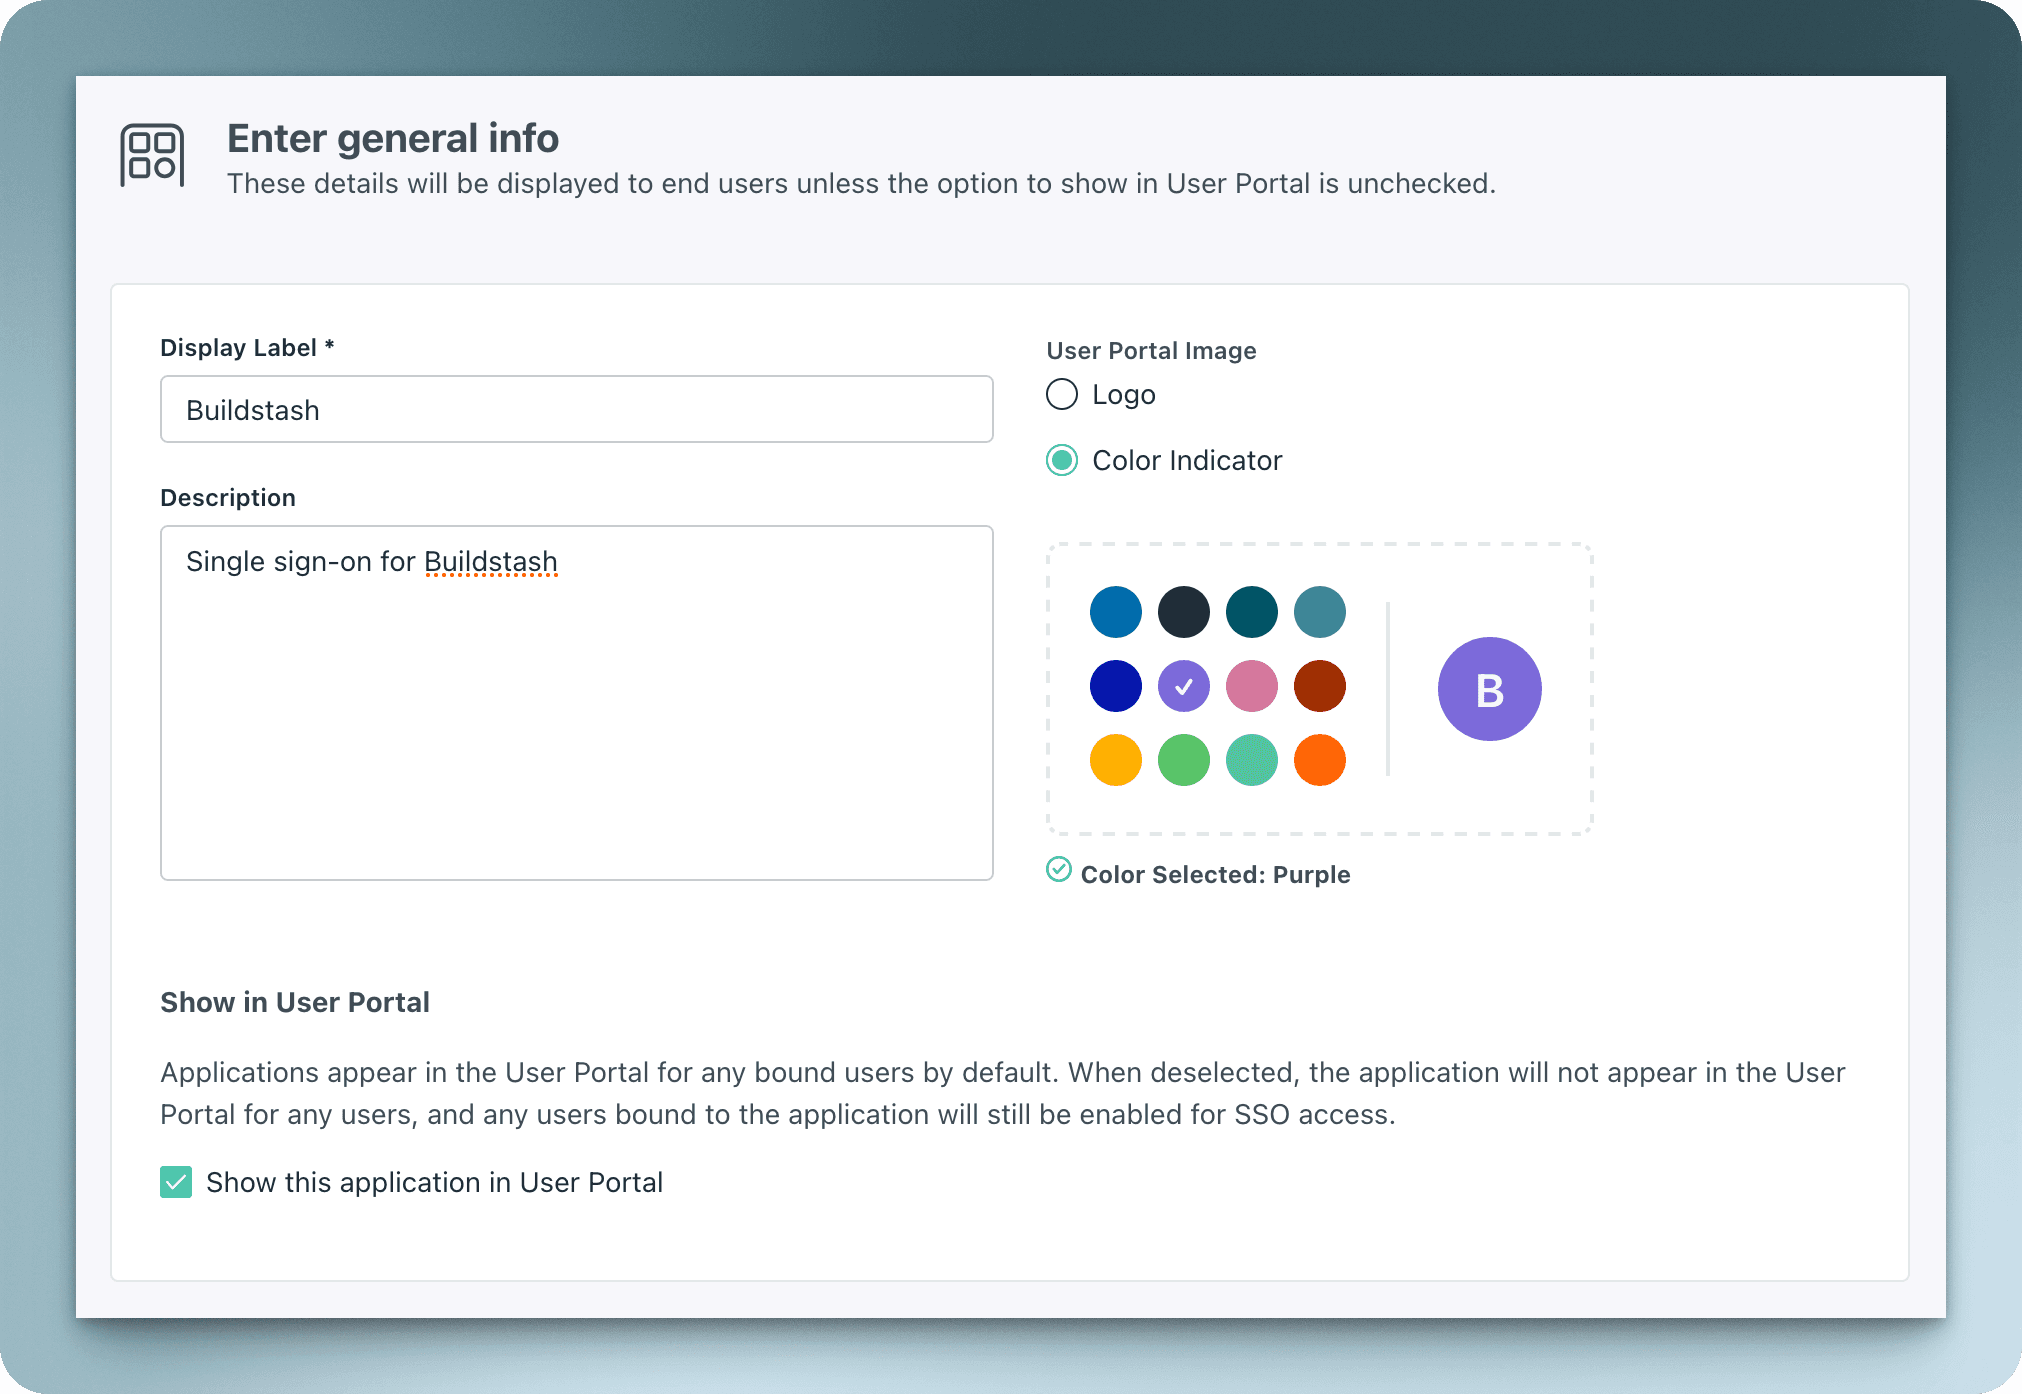
Add "Buildstash" as the display label, and add a logo or preferred color to display to users.
Complete the "Redirect URI" and "Login URL" fields very carefully. They must exactly match.
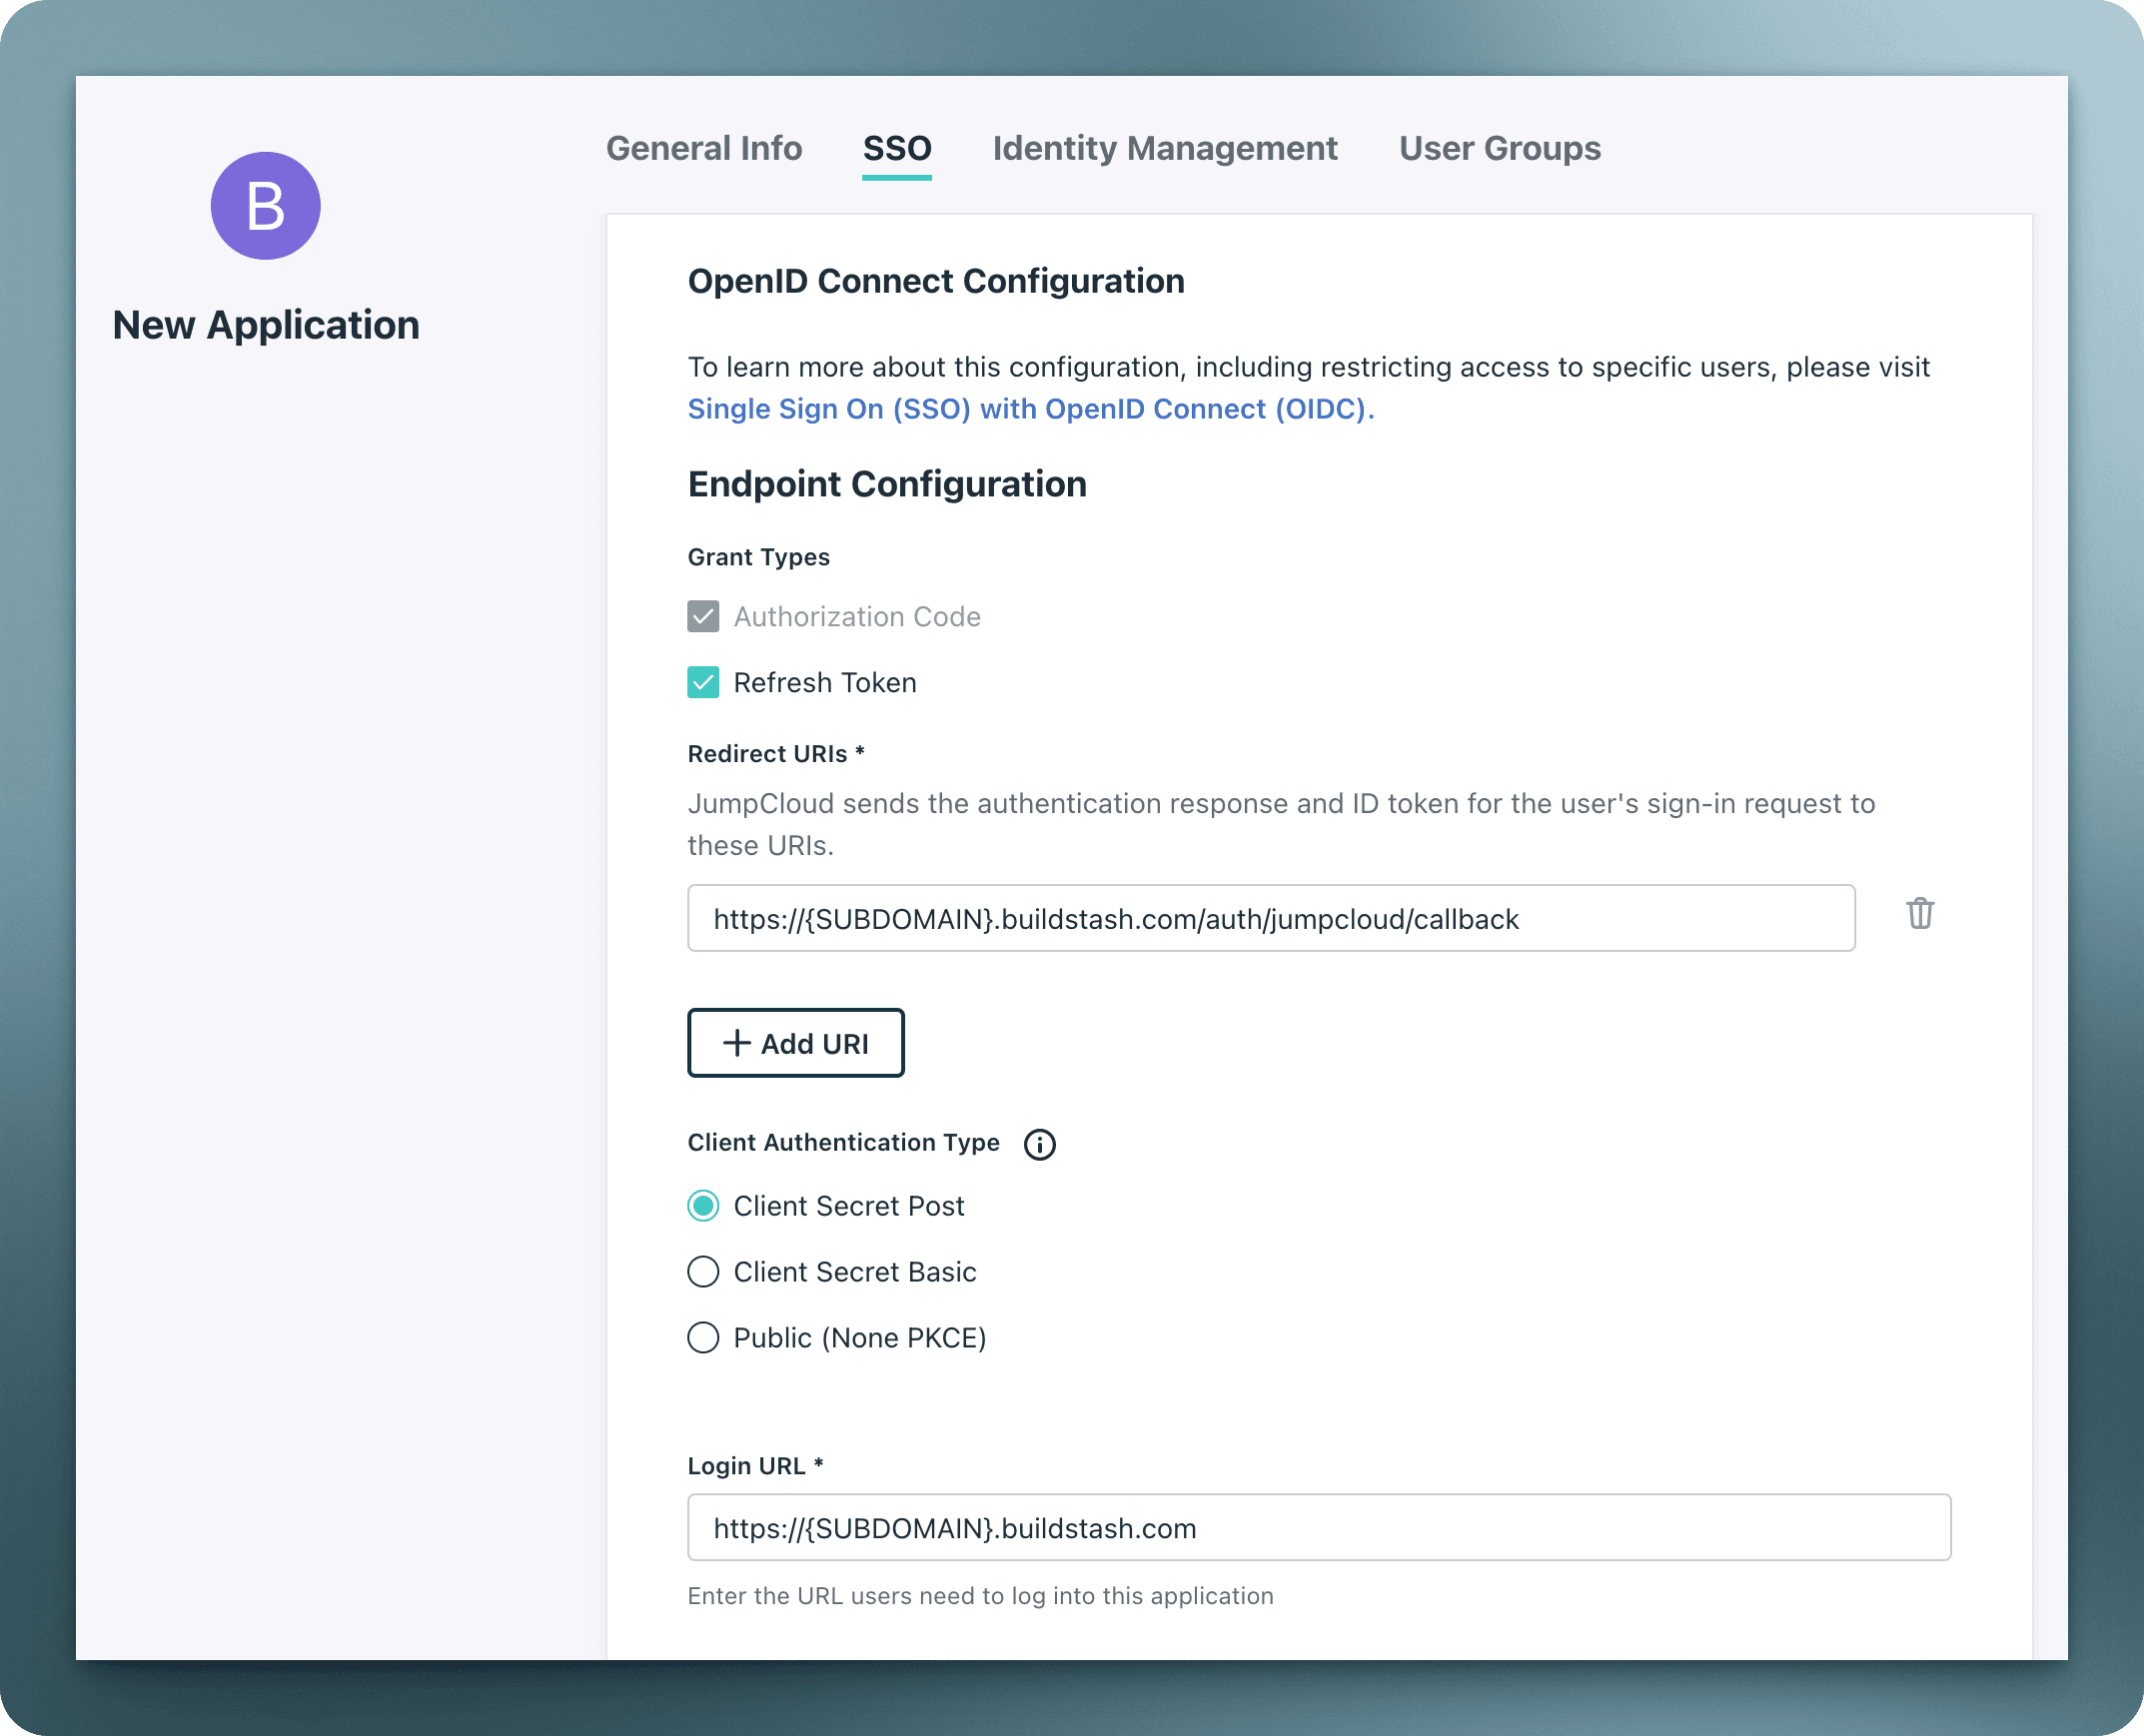
The redirect URI must use your workspace's custom subdomain. The format must be:
https://{SUBDOMAIN}.buildstash.com/auth/jumpcloud/callback
You must set "Client Authentication Type" to "Client Secret Post".
Select both "Email" and "Profile" user standard scopes.

You can then click "Activate".
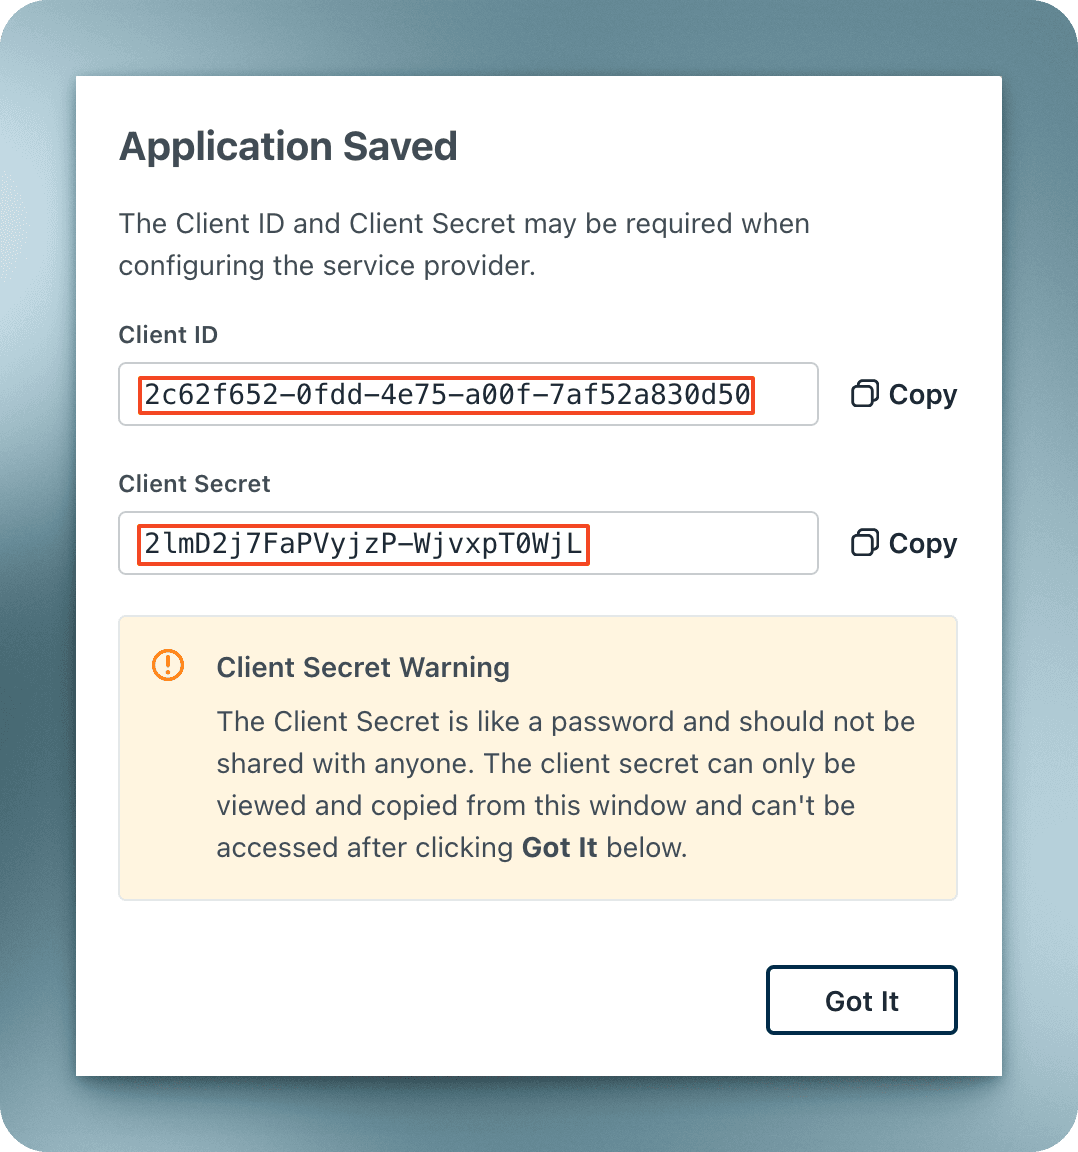
Copy the credentials presented. The secret will not be displayed again - so copy and store it securely, such as in a password manager.
The final step in JumpCloud is to ensure you grant the users you wish to have SSO to Buildstash access.

Configure SSO in Buildstash
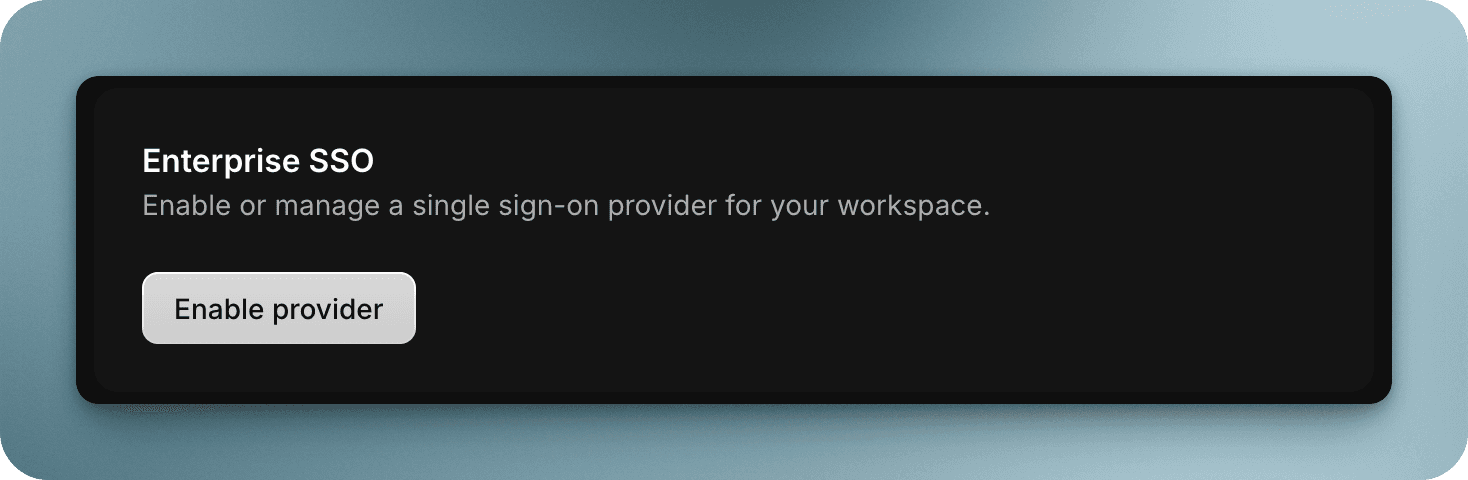
Go to your workspace settings, and under "Enterprise SSO", select "Enable provider".
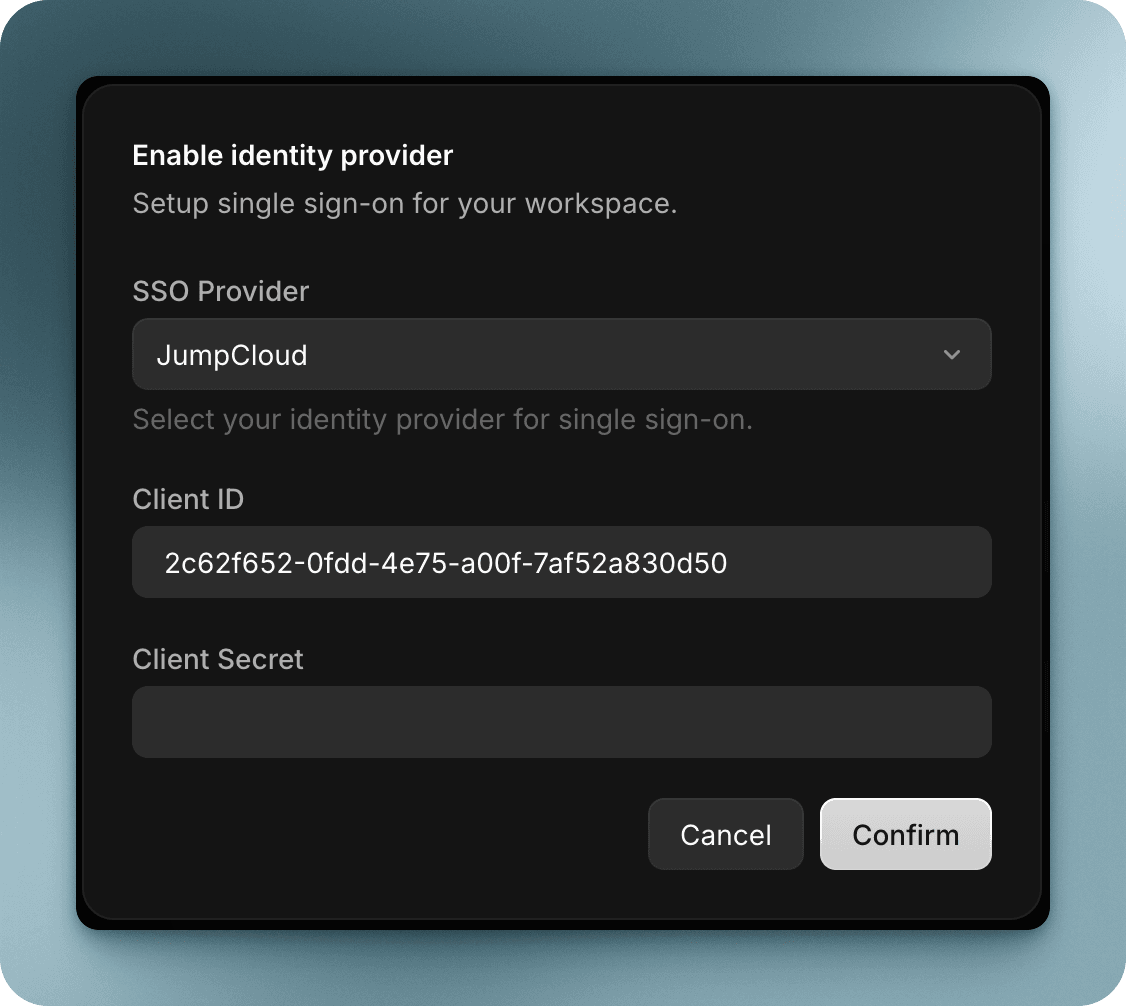
Input the client ID and secret for JumpCloud you copied from a previous step.
Once details are entered and confirmed you'll see "SSO configured with provider: JumpCloud".
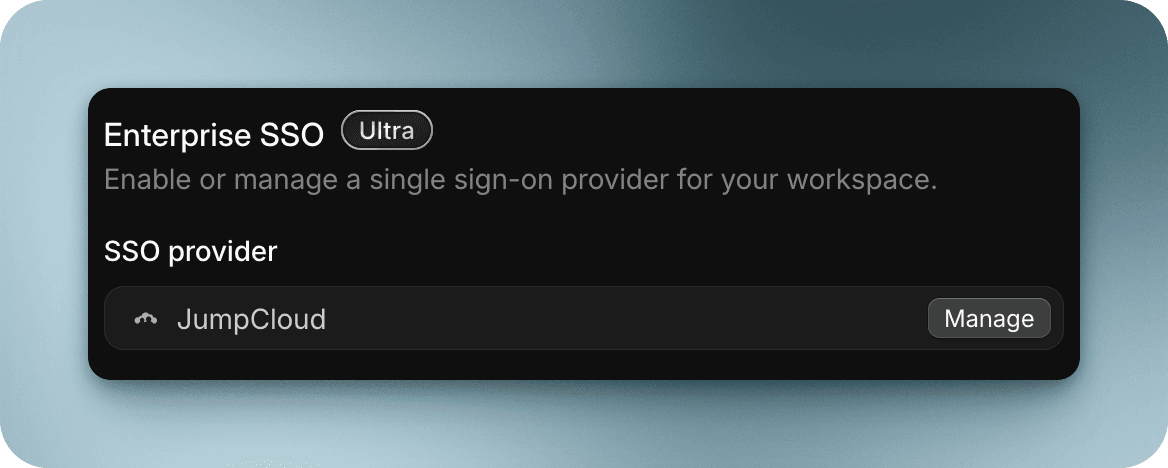
Select "Manage" to update credentials in future, disable non-SSO login, or remove JumpCloud as a login provider in future.
You can now navigate to the login page on your workspace custom subdomain, and the JumpCloud SSO option will be presented.