Auth0
Configure Auth0 single sign-on for your organization
This feature is available to users on our Ultra and Enterprise plans.
Introduction
Follow these instructions to allow your users to login to your Buildstash workspace using Auth0.
Create SSO Application in Auth0
In your Auth0 dashboard, navigate to "Applications", and "Create new application".
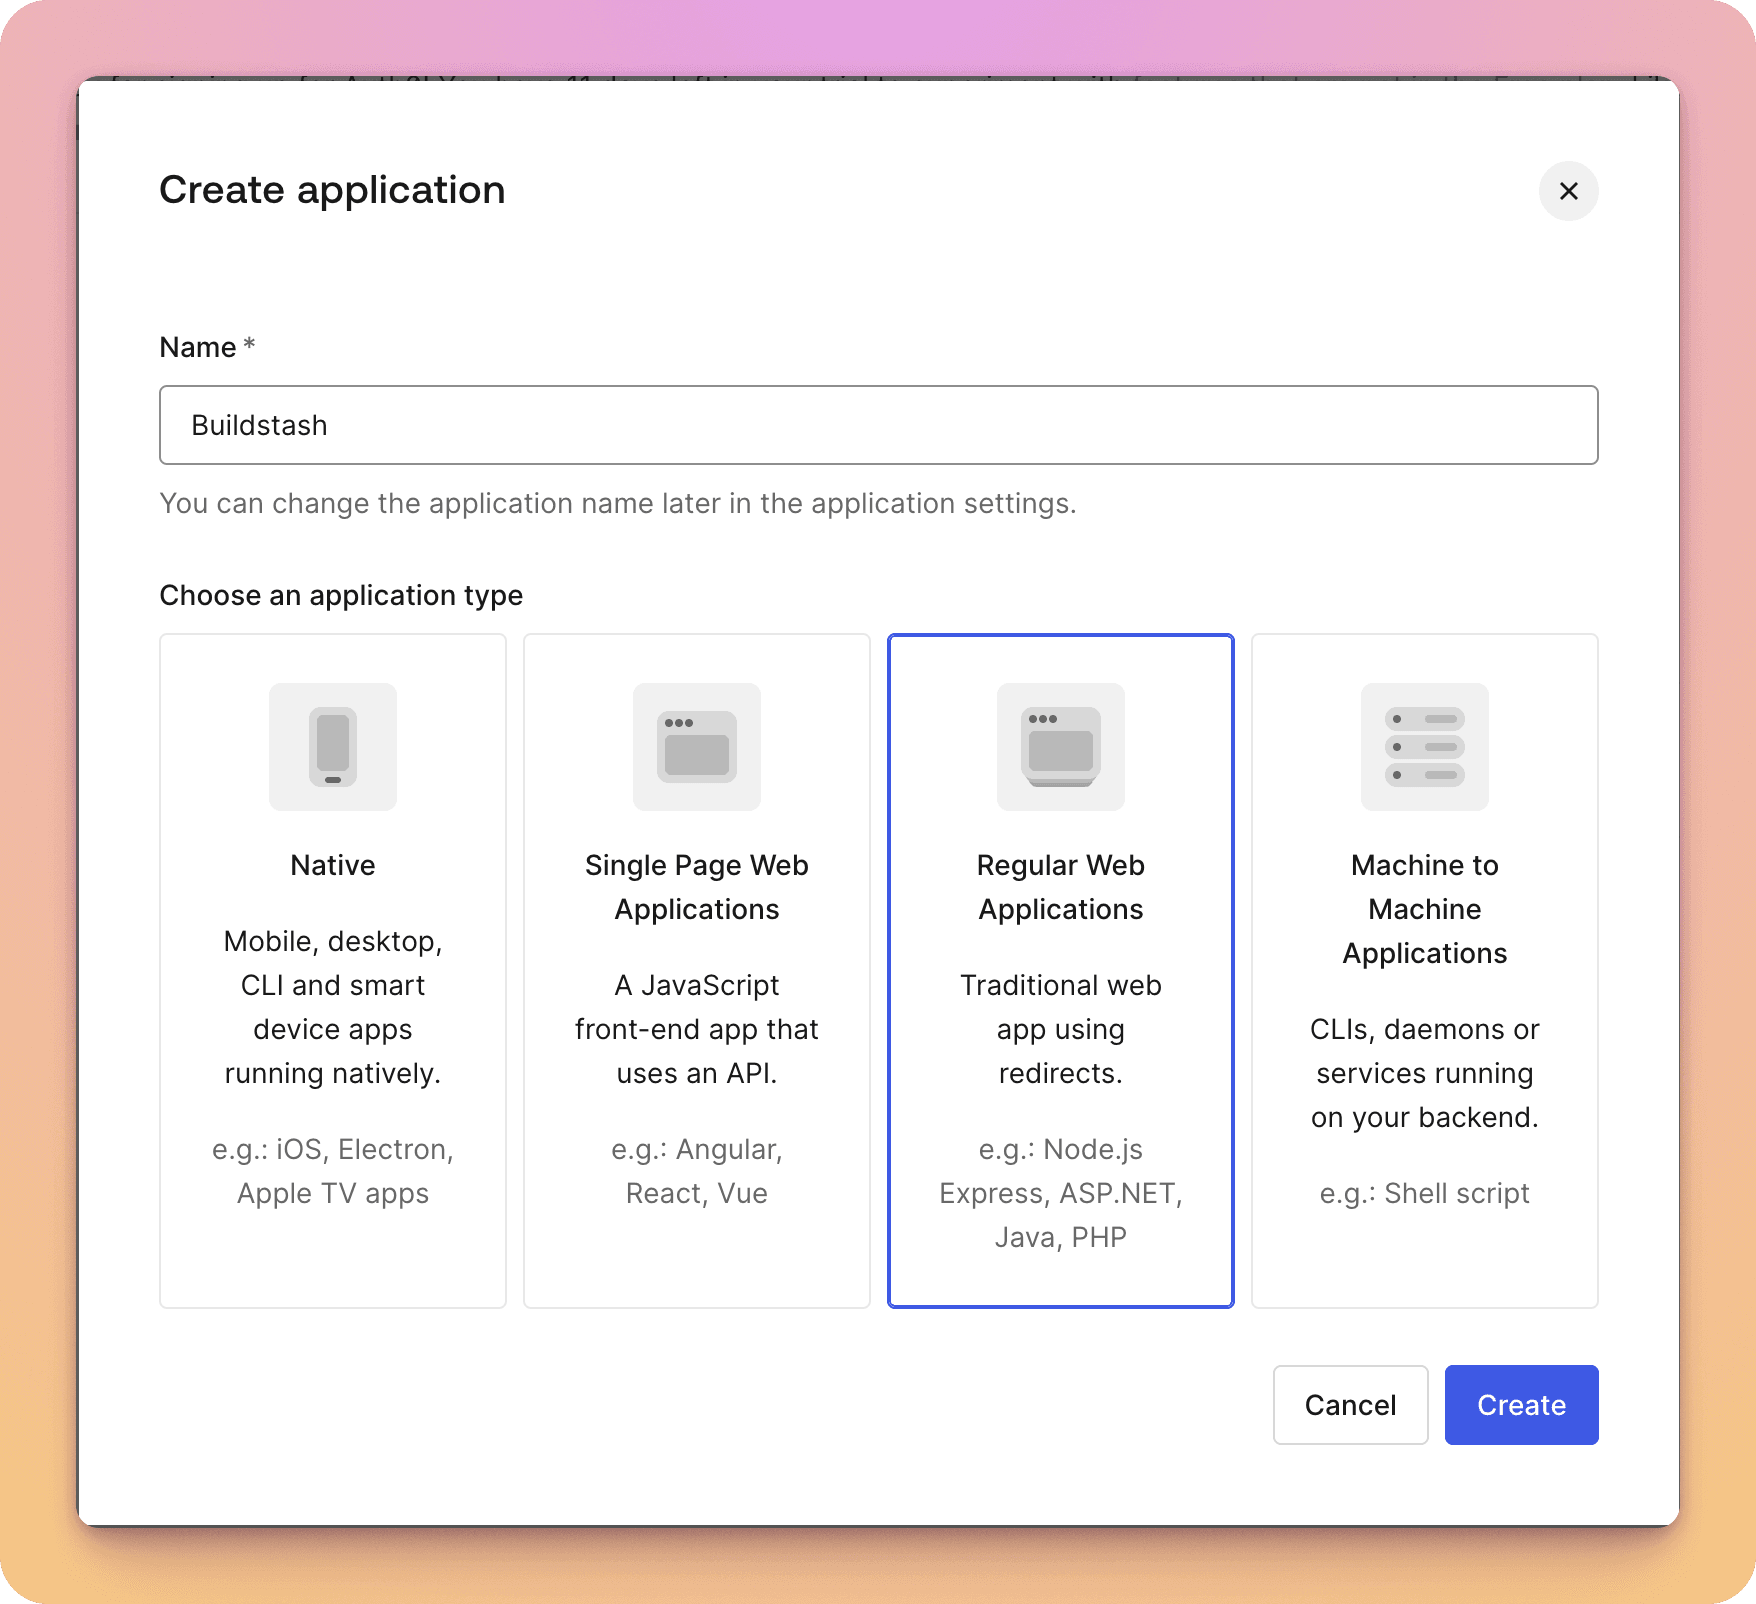
Select "Regular Web Application".
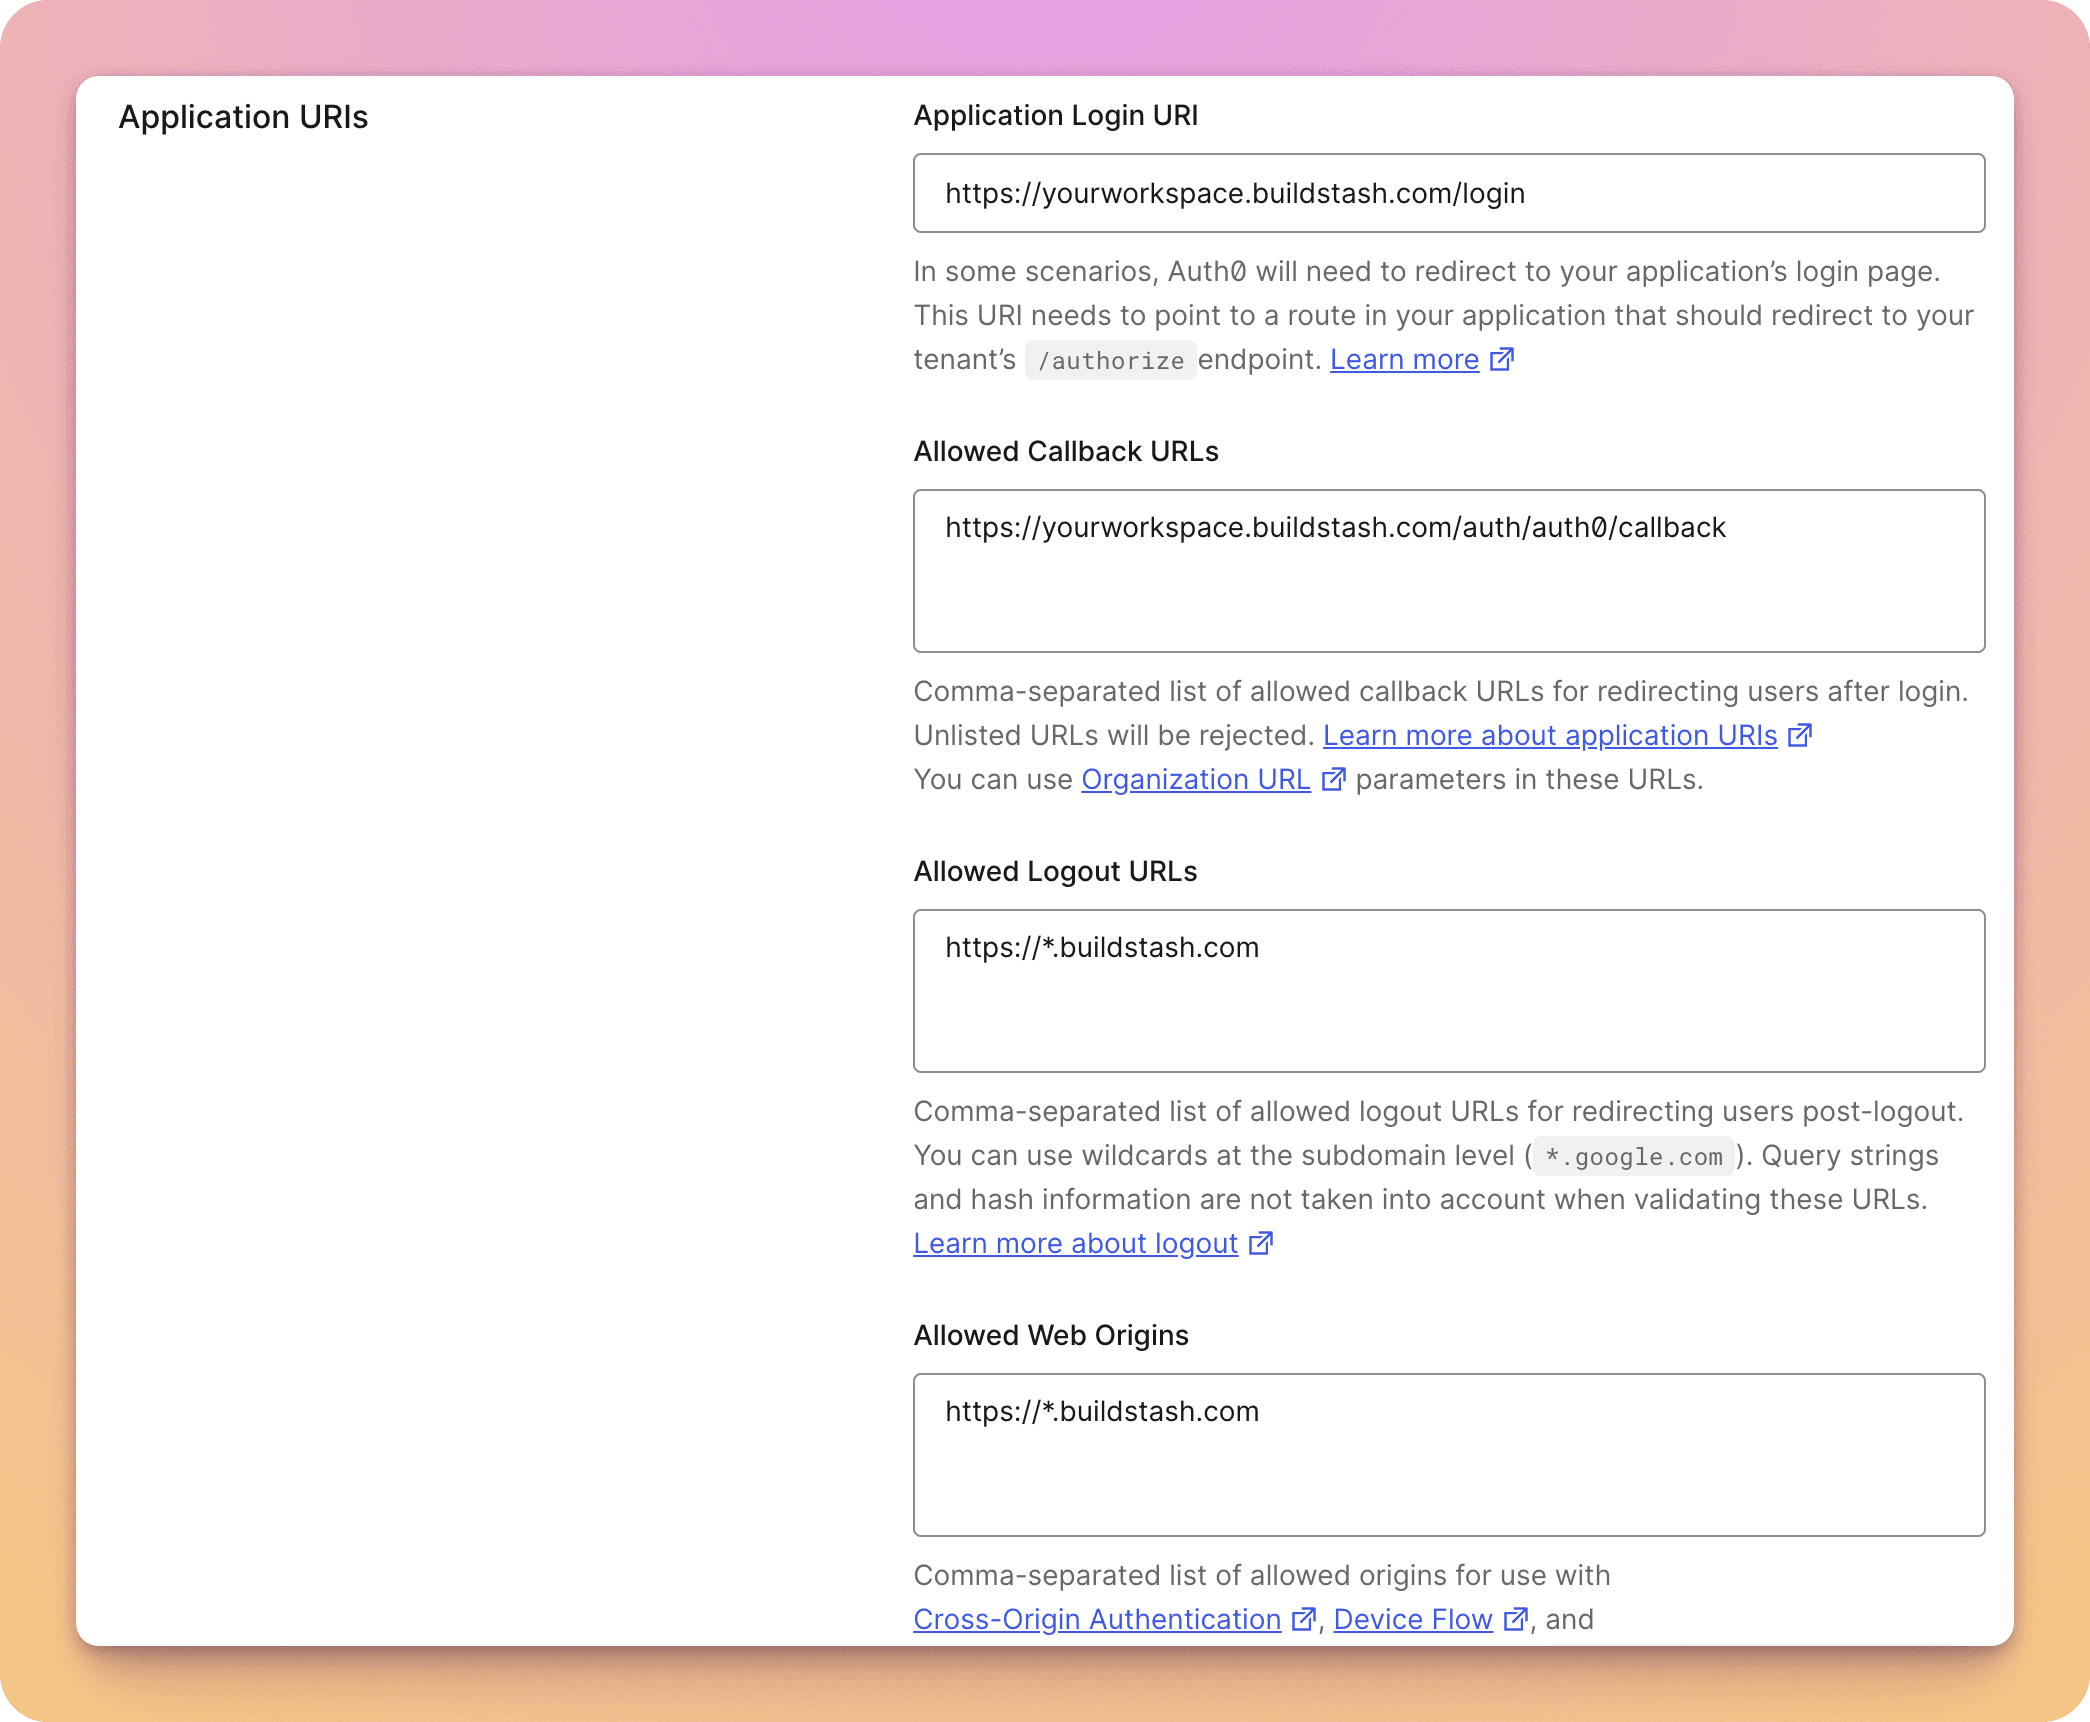
There are some key details to enter for your new application.
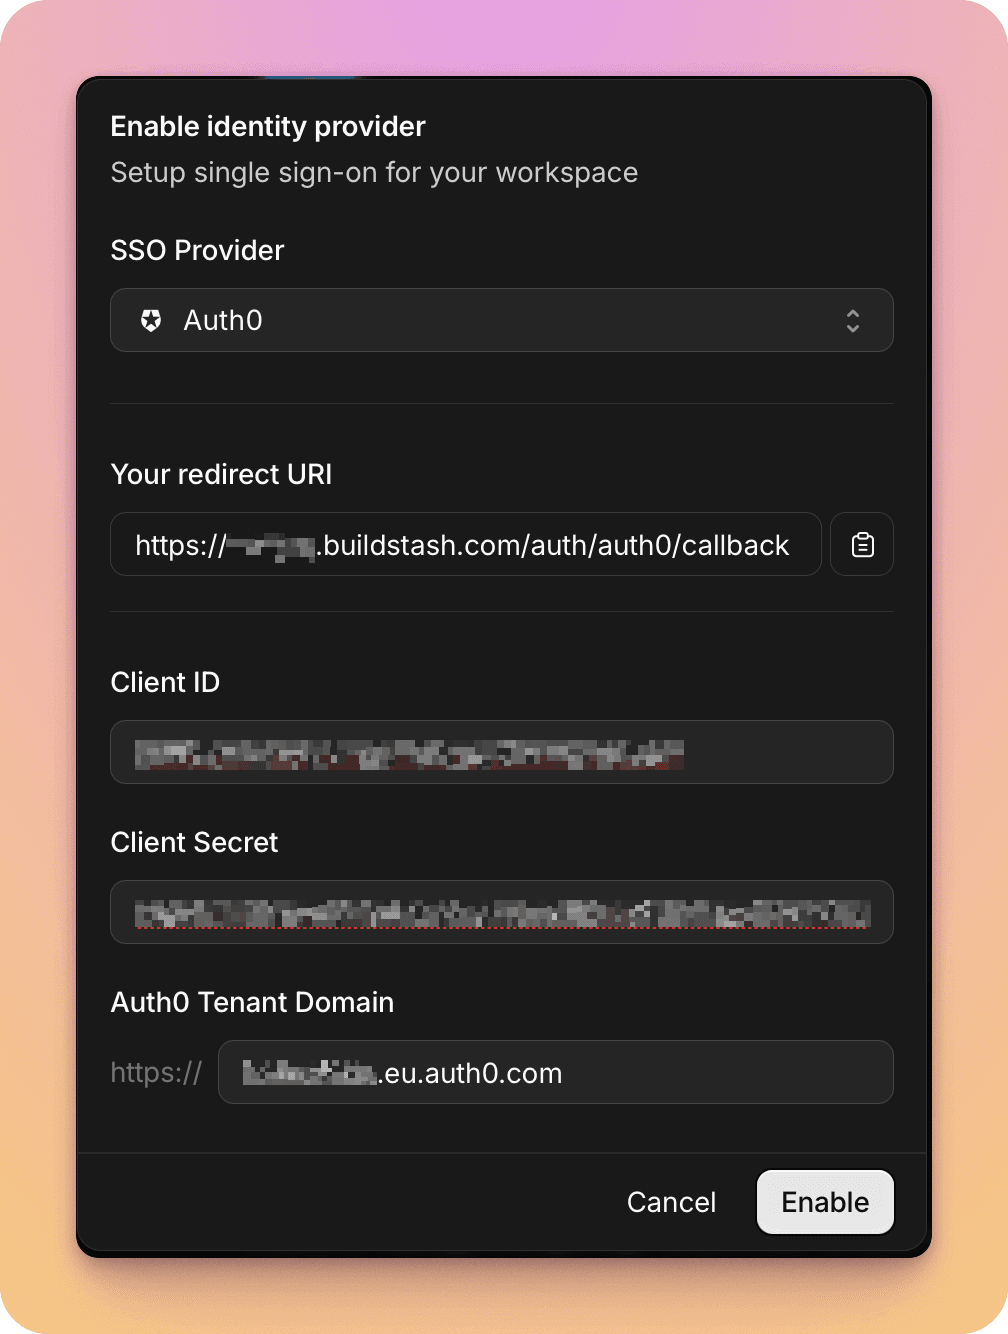
Under "Application URIs" you must enter your workspace-specific redirect URI under "Allowed Callback URIs". You can find this in the "Enable provider" dialog covered below, but it follows the format:
https://{SUBDOMAIN}.buildstash.com/auth/auth0/callback
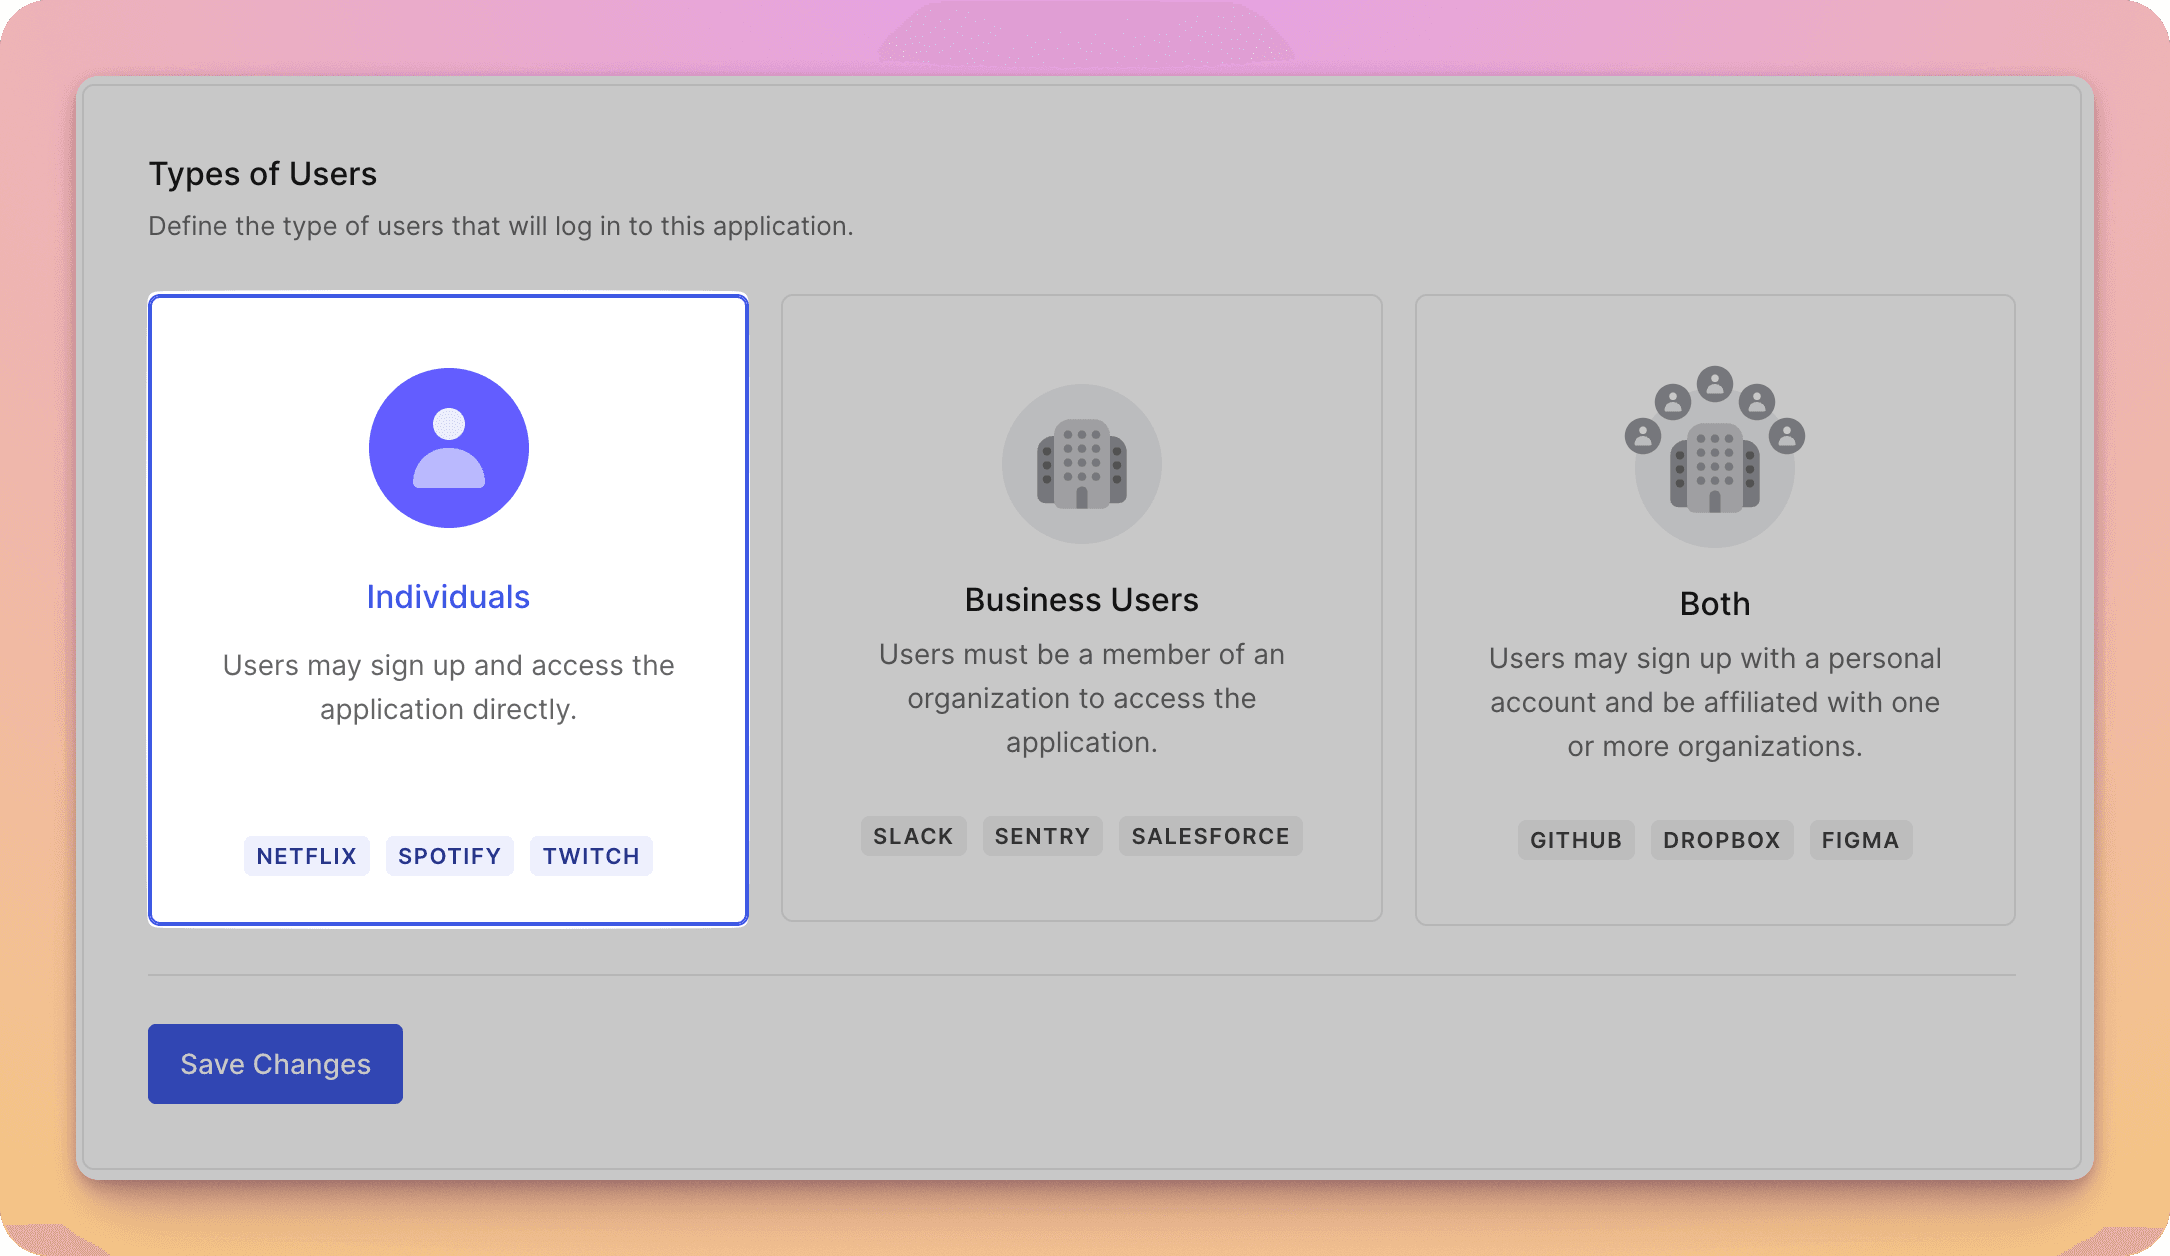
Configure the login experience settings for your application.
Remember and grant access to whatever users you'd like. In "User Management" select a user profile, and in "Authorized Applications" grant access to Buildstash.
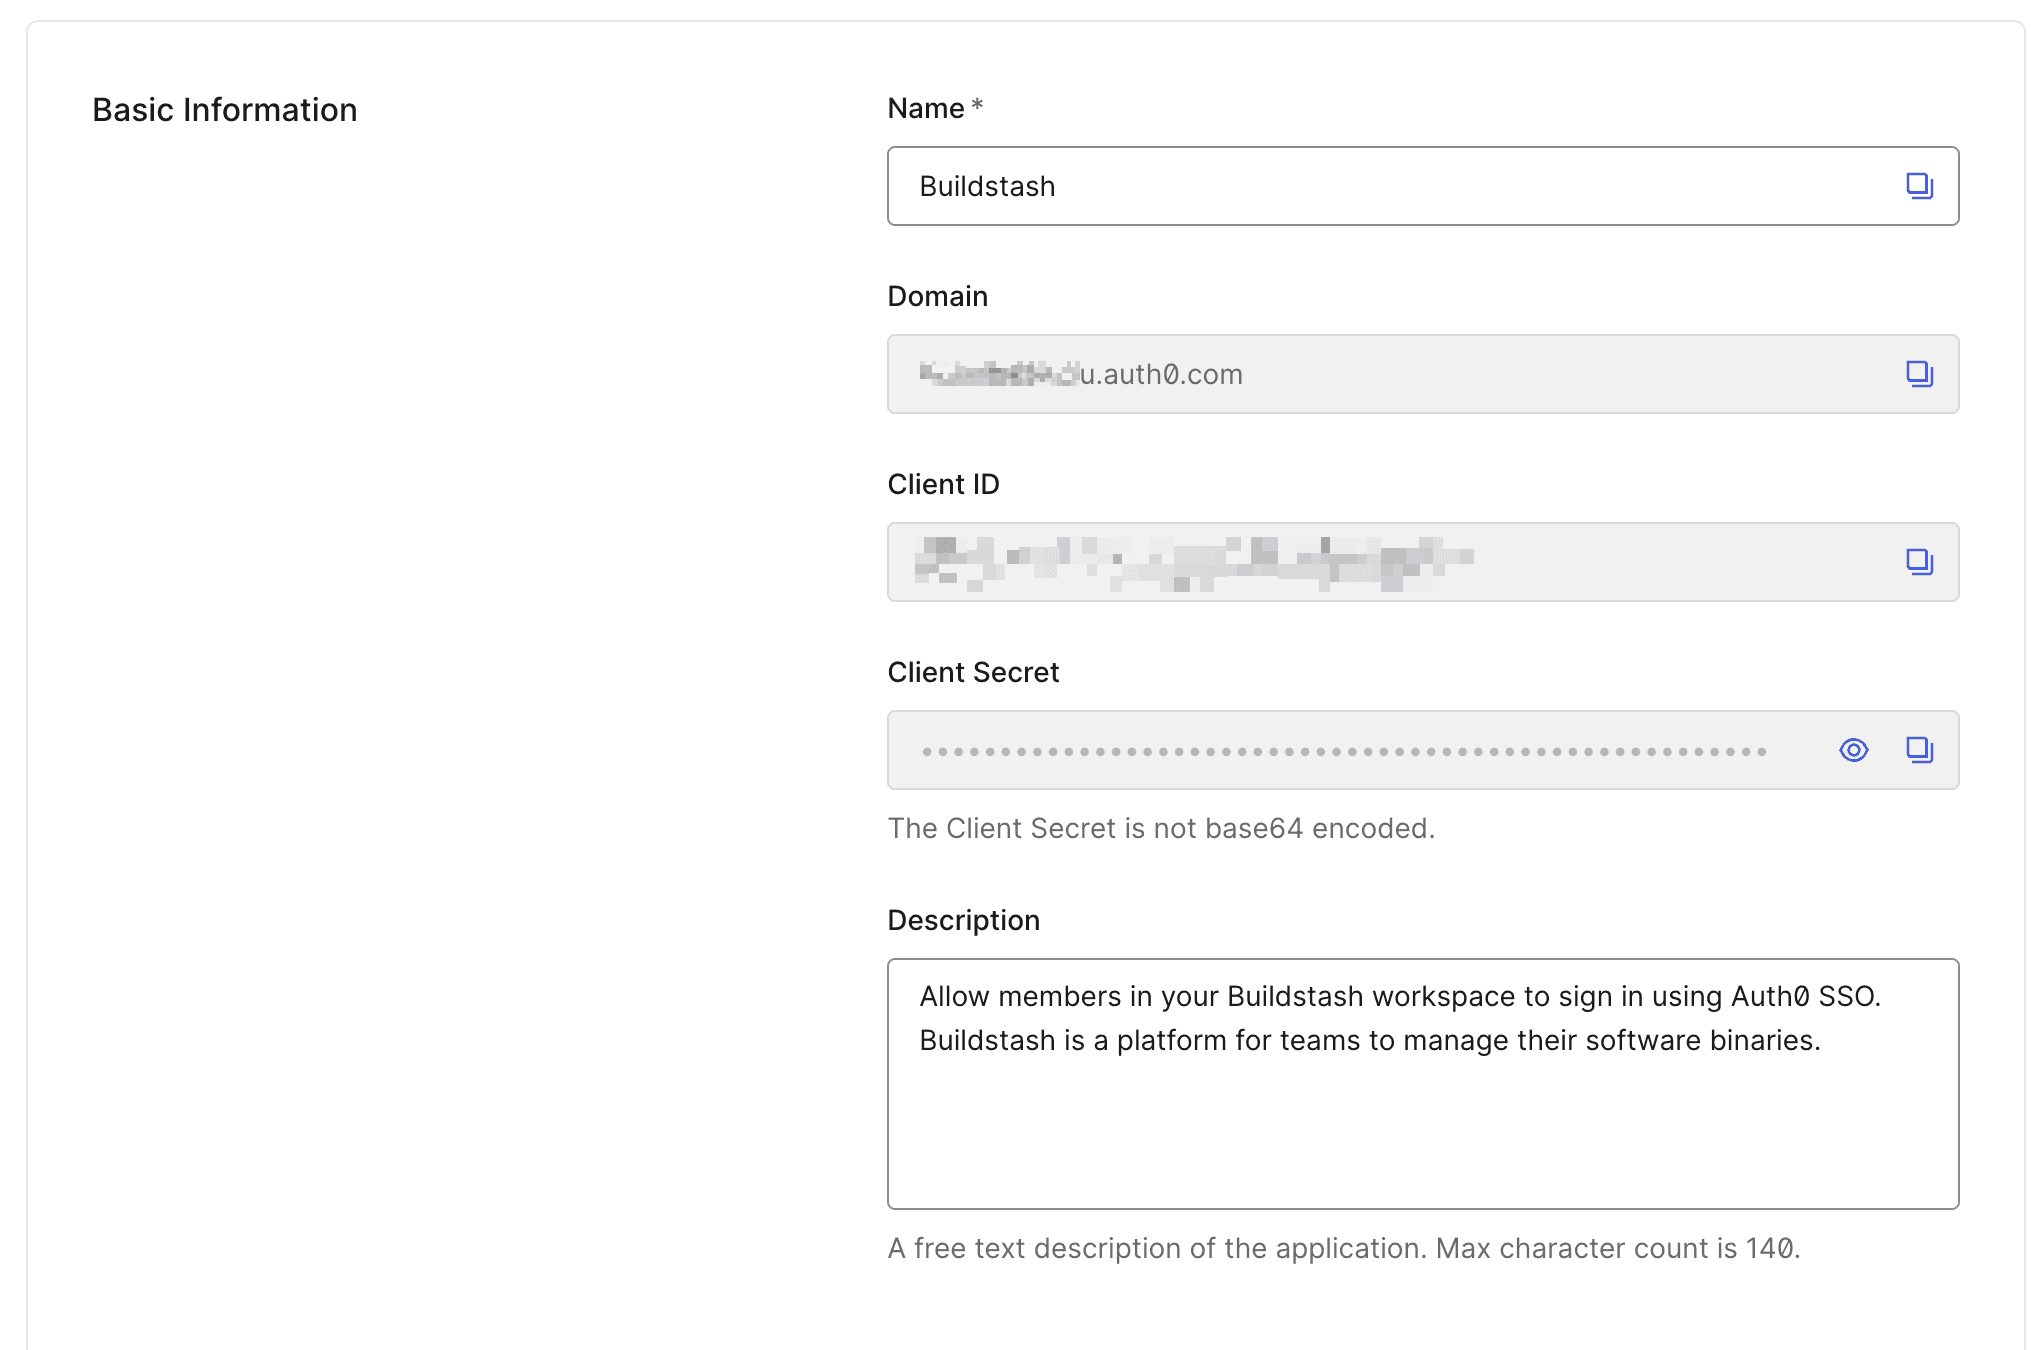
Now you're setup in Auth0. You'll need the client ID and secret from your application settings to enter into Buildstash.
Configure SSO in Buildstash
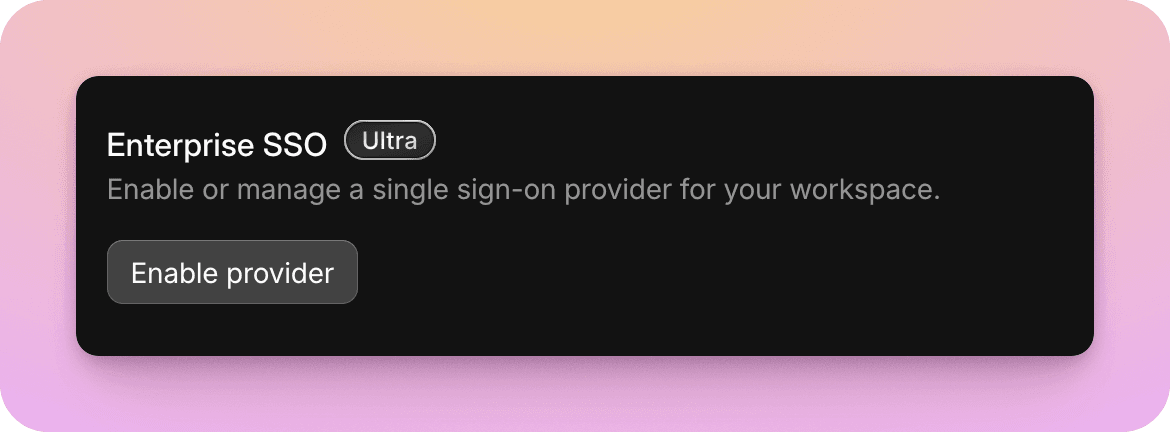
Go to your workspace settings, and under "Enterprise SSO", select "Enable provider".
Input the client ID and secret you copied noted from the previous step. Your redirect URI to enter in Auth0 is also shown here.
You'll also need to input your Tenant Domain. This consists of the name of your Auth0 tenant, and for non-US locations will also include a region component (like 'eu' for European Union, or 'ca' for Canada).
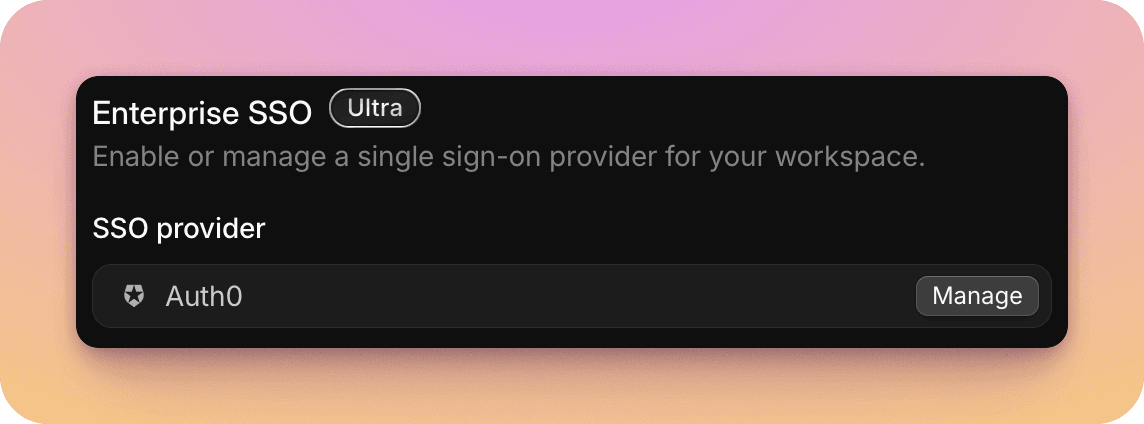
Once details are entered and confirmed you'll see Auth0 connected.
Select "Manage" to update credentials in future, disable non-SSO login, or remove Auth0 as a login provider in future.
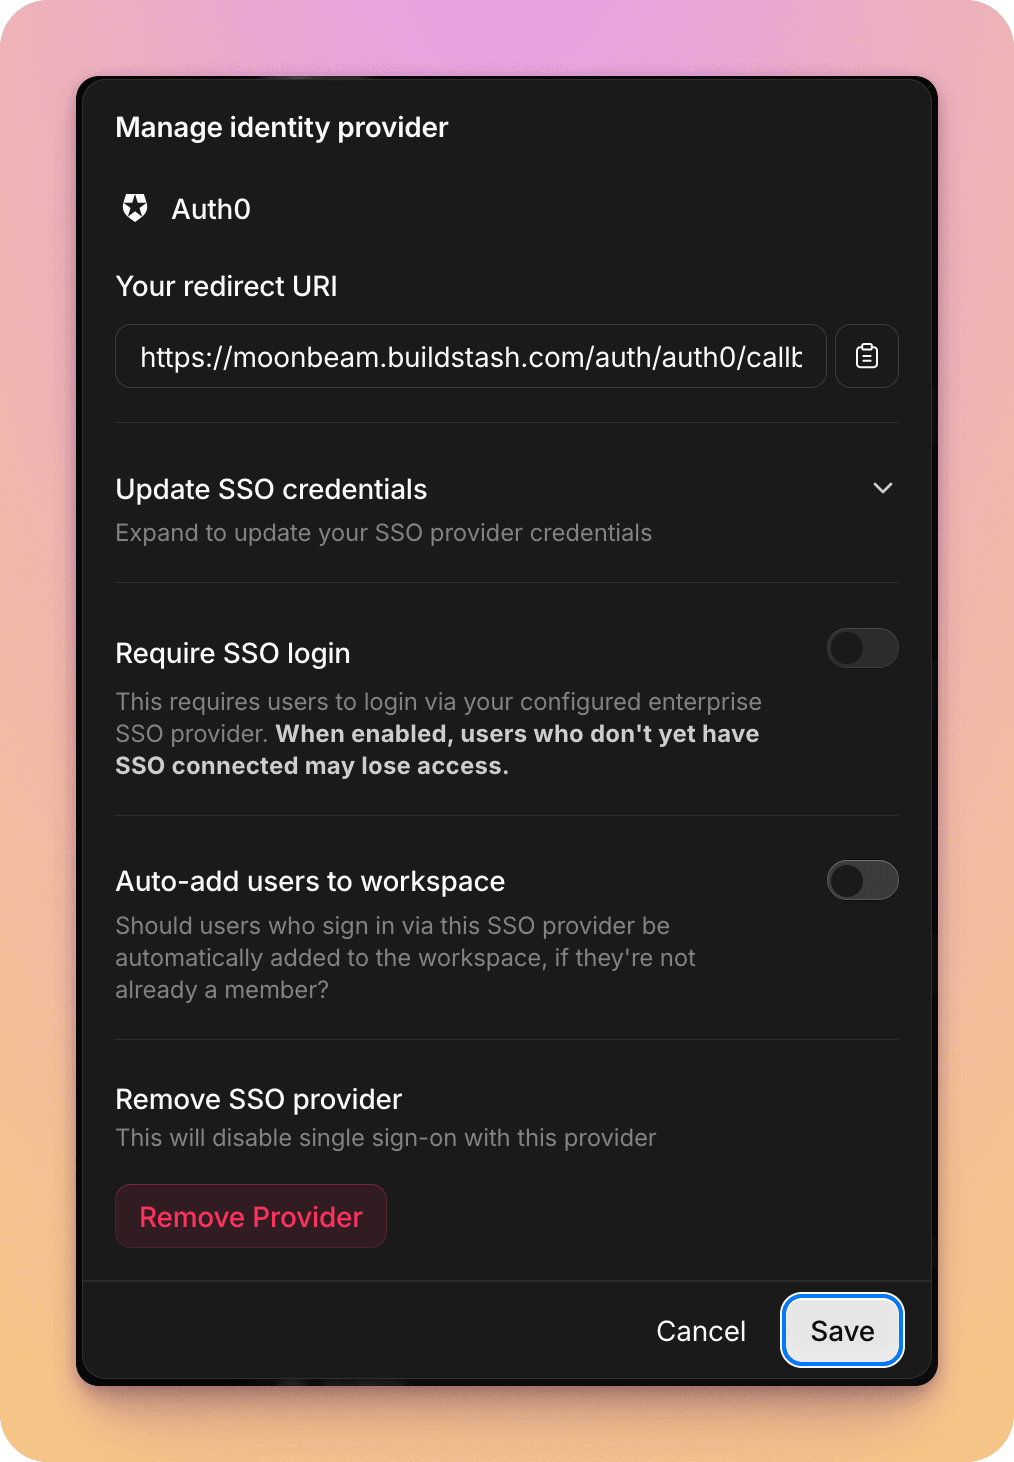
You can optionally require users login via this SSO provider to access your workspace, and there's an option to auto-add users who login via this provider to your workspace if they're not already a member.
You can now navigate to the login page on your workspace custom subdomain, and the Auth0 SSO option will be presented.